Brief
Draw an opening scene frame into the top third of an A3 piece of paper or card. Look back at your favourite opening scene that you sketched from the previous exercise. Perhaps the visual elements of it inspire you, the place you drew looks visually interesting and has potential for narrative development. As it is only a quick sketch, take some time to redraw it or work into it so it is more of a finished drawing. Perhaps you drew it in pencil and it now needs ink or colour. When you are happy with it, redraw or cut-and-paste it into the box you have drawn.
Now draw a four-panel tier on the rest of your A3 piece of paper or card. Think about who might live or work in your opening scene. Don’t work from what you know about the programme you took the drawing from, but instead invent a character that you can develop into a new story.
Characters in comic stories are normally drawn by artists in their own particular visual style or technique. For now, though, keep your drawing quite simple and as plain as possible; there will be plenty of opportunities to experiment with stylised approaches later in the course.
In the panel boxes draw a sequence images that introduce your character and begin a possible story.
Devising the Narrative
I looked at each of the sketches from the previous exercise and decided to use the opening scene from episode 1 of The Handmaid’s Tale as, although I have seen it, I could disconnect the original story from the sketch, which was something I found quite difficult with many of the others. I thought it had potential in terms of who could be in the car and where they would be going.
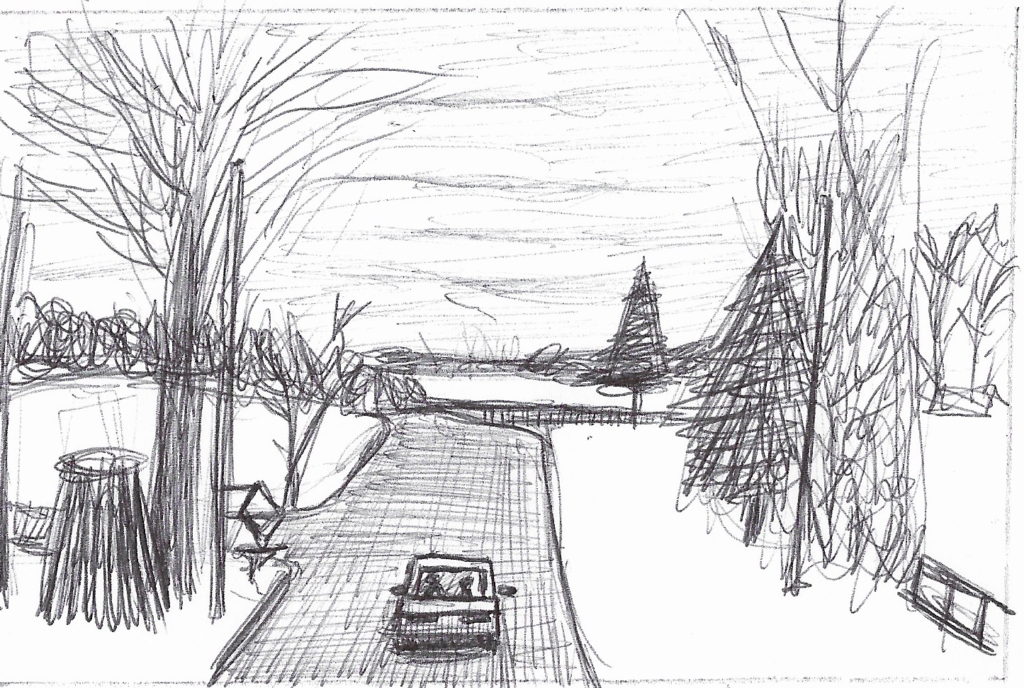
I resisted the temptation of returning to the source material to redo my sketch and based all my work in this exercise on the original one above. I wanted to keep the style simple and although my drawing was based on the opening scene it evolved into my own design.
I drew out some rough panels as prescribed in the draft and gradually filled each one out to develop my narrative.
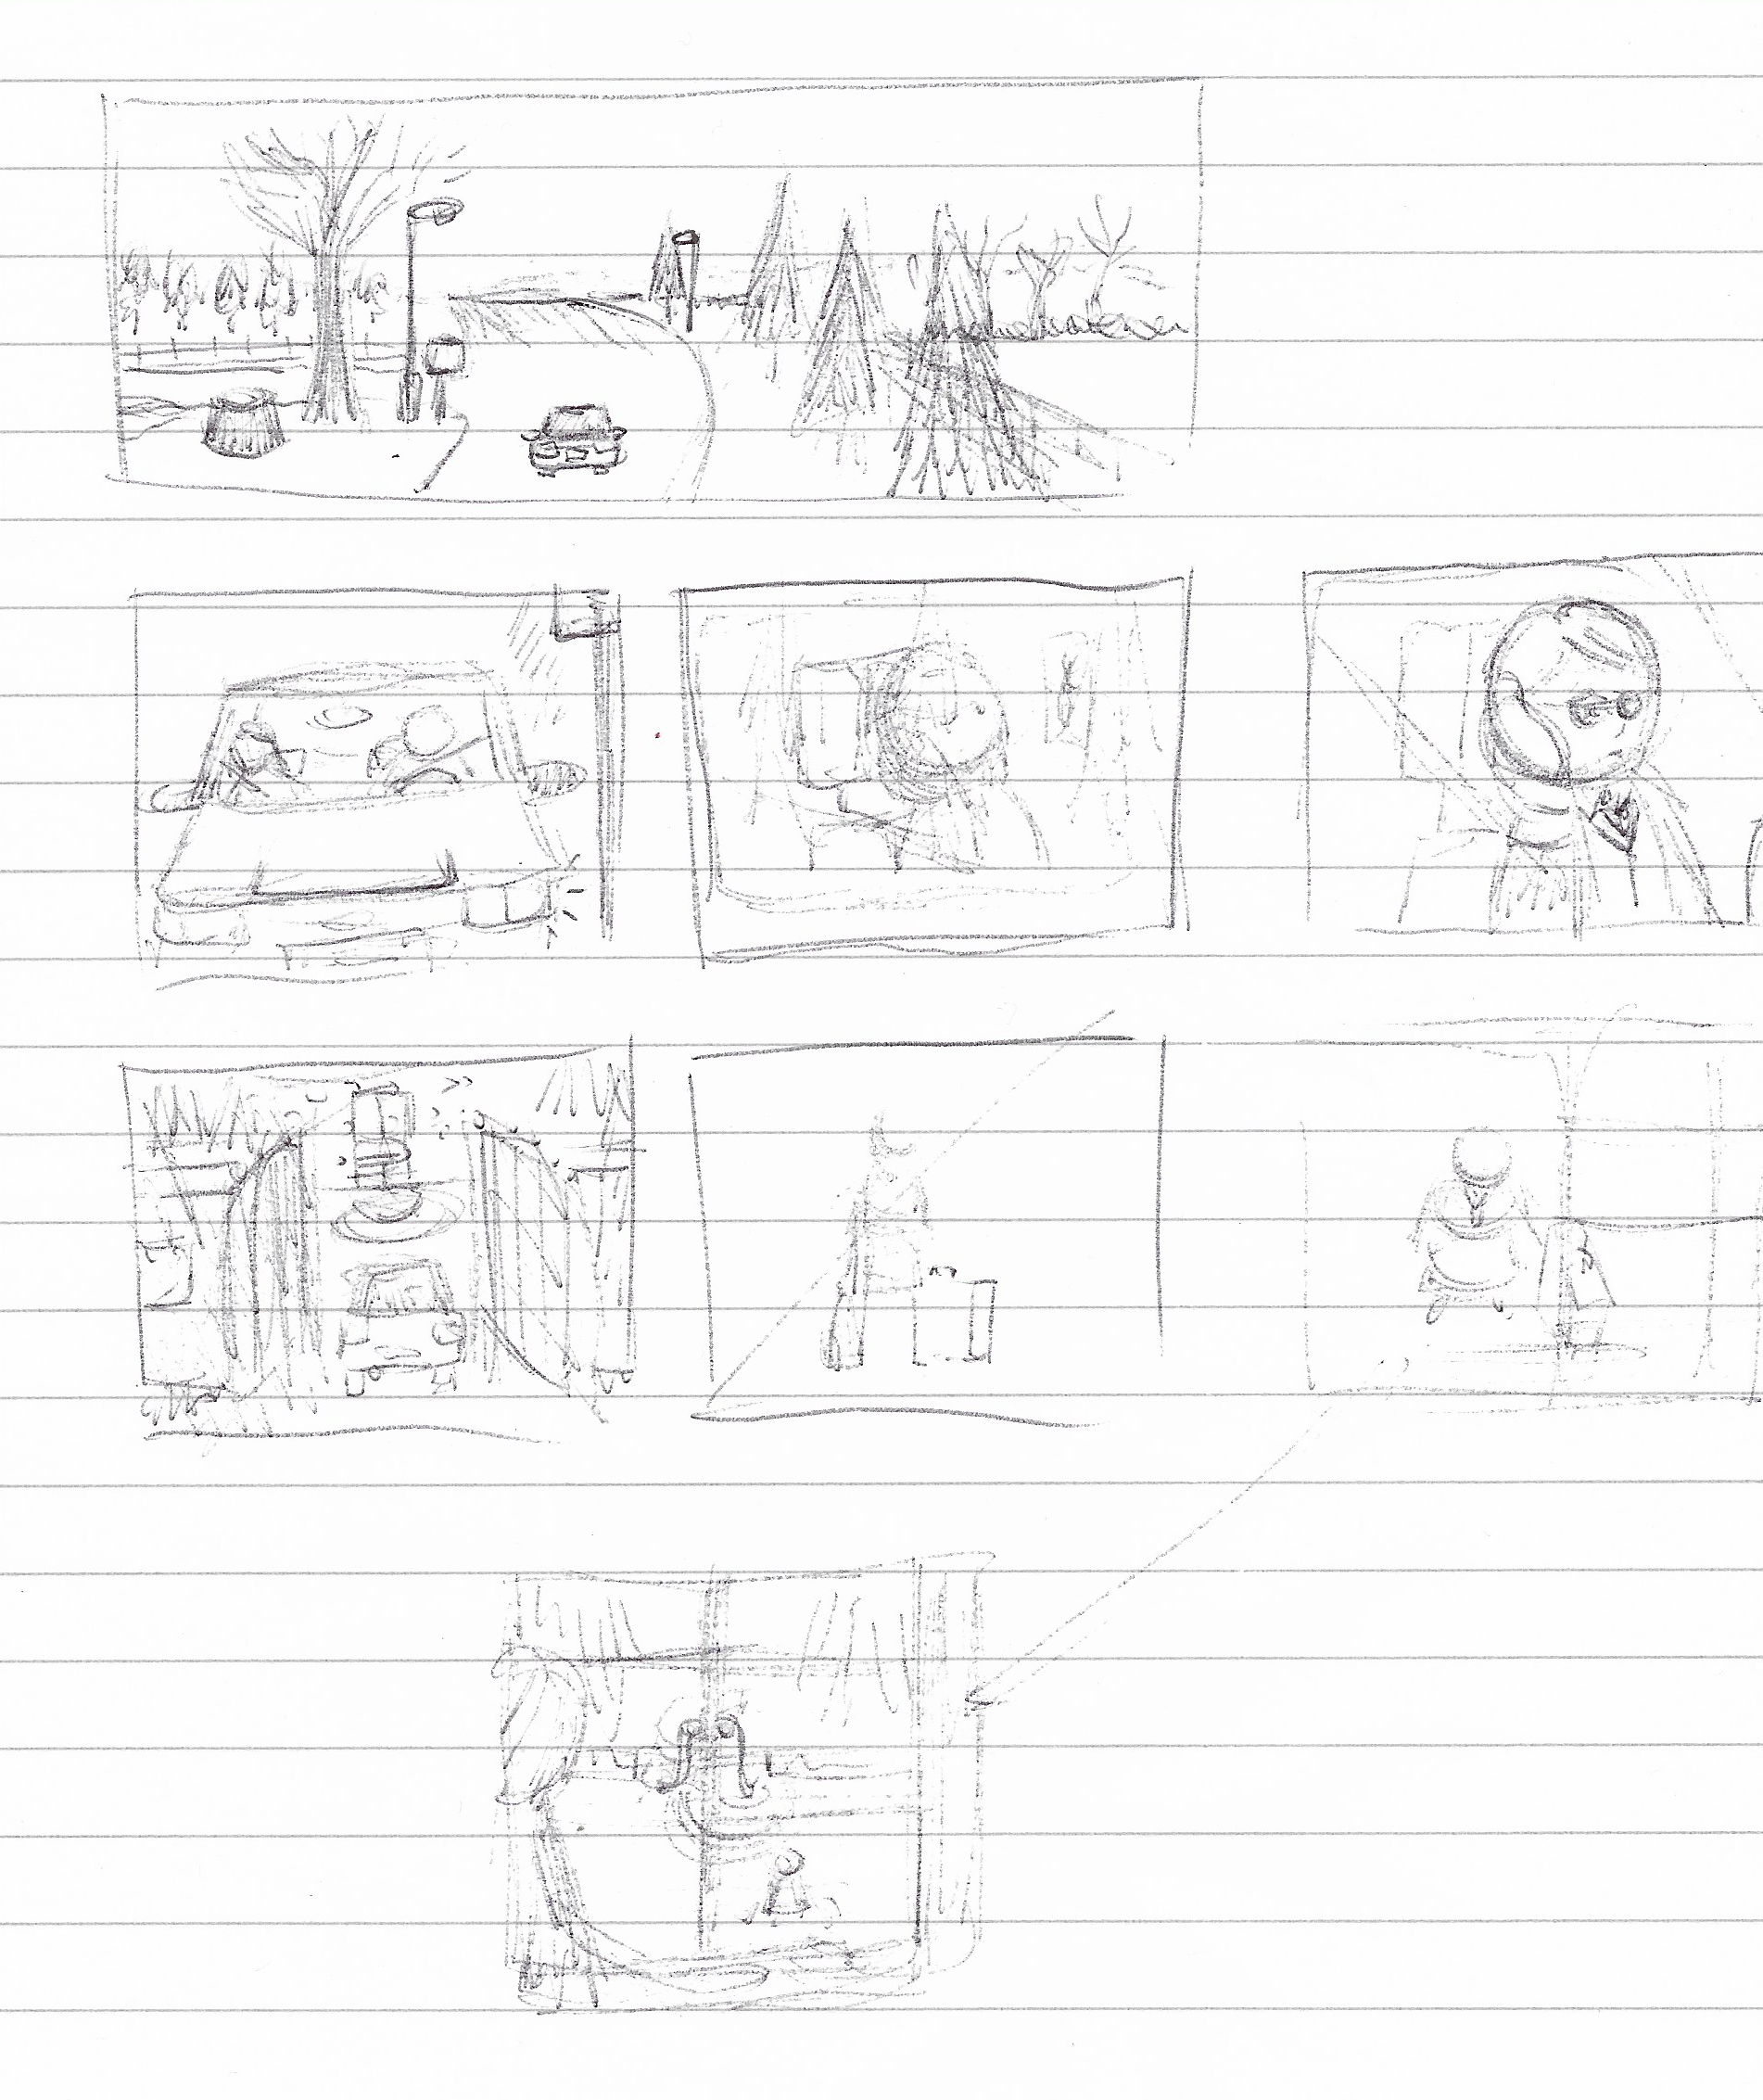
The basic concept was that a girl is being driven to her boarding school in a very remote location and she is not particularly happy about it. By the last panel it is not clear why she is so apprehensive, if this is due to what/who she is leaving or where she is going; who the male in the car is; the identity of the girl in the window; or what the relationship between them is.

I surprised myself with how pleased I was with my initial ideas and how smoothly it seemed to formulate – it made a welcome change! In the future, I would like to experiment more with viewpoints, e.g perhaps the girl in the window should have been looking down more and the view would be over her shoulder with a more extreme angle.
Working at A3 Scale
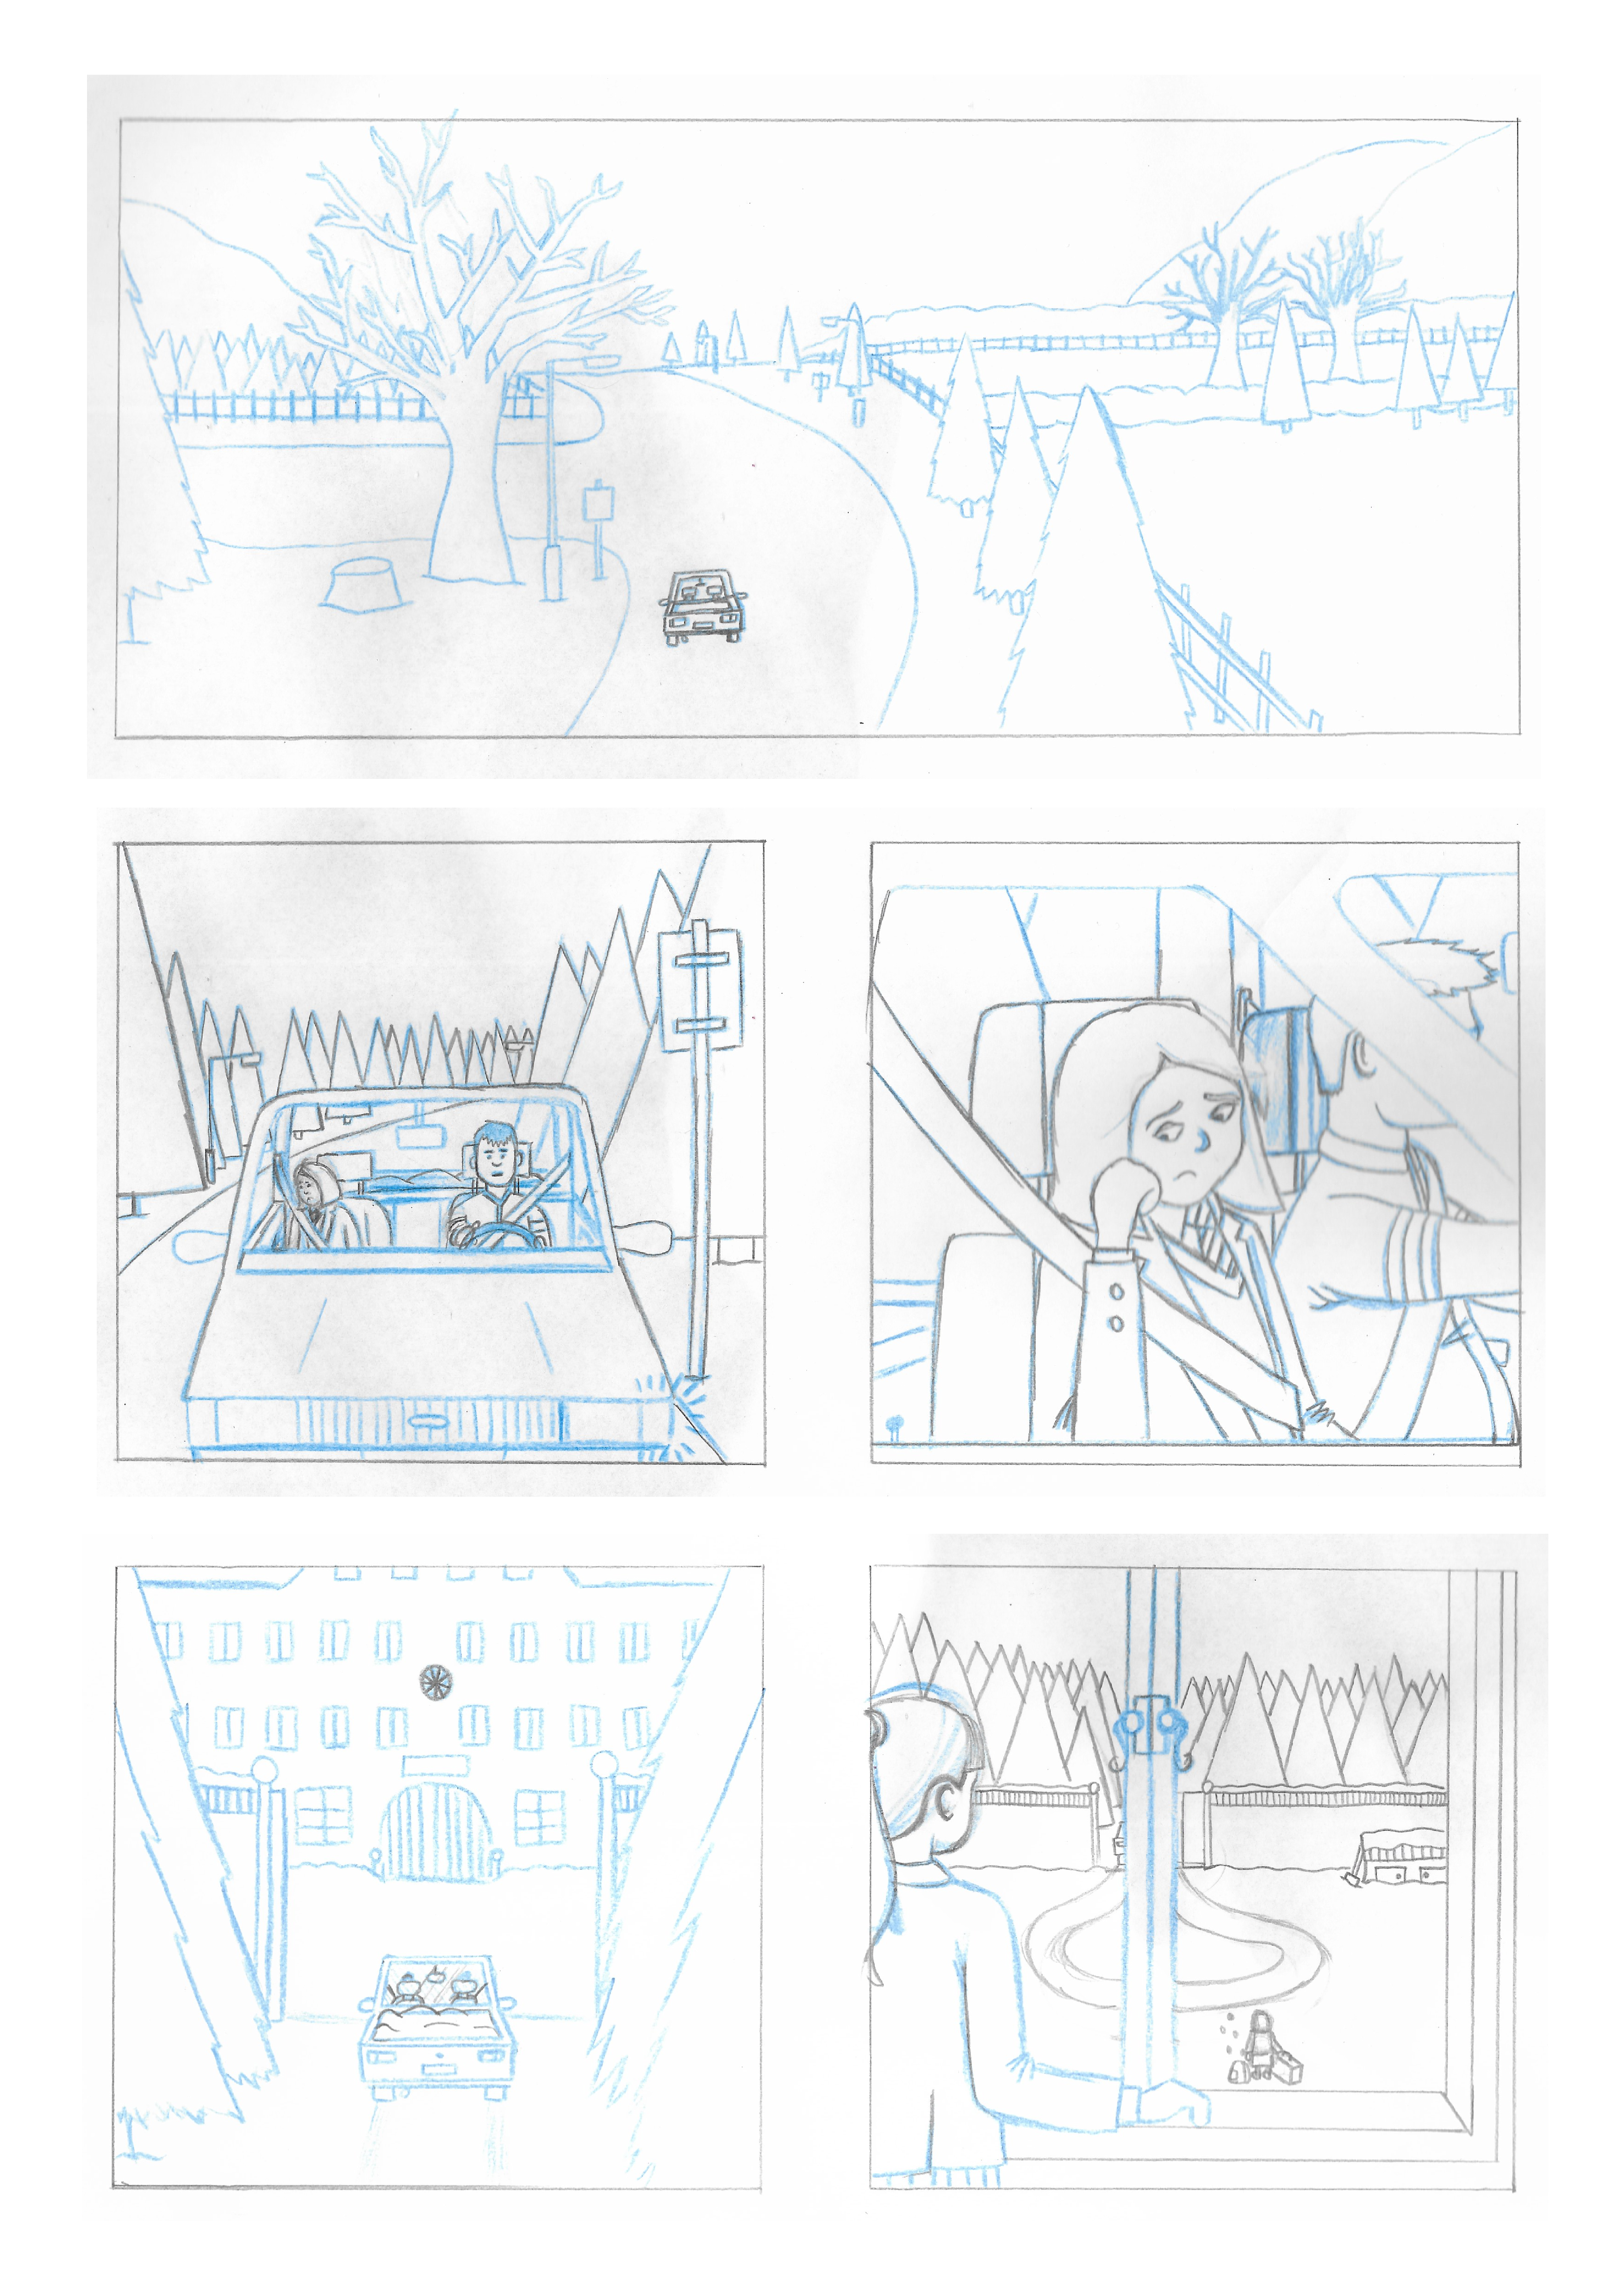
I then mapped out the panels on an A3 sheet of paper and proceeded to fill in each one with the appropriate drawing.

Using my light-box I then copied out a cleaner line version. I used an HB pencil to go over some of the blue lines in this version as I found easier to make more definitive marks, which would ultimate be easier to copy in the final piece.
Final Version
Once I had reached this point I became slightly stuck as I was unsure what material/s to use for my final version. I was finding it quite difficult to overcome the urge to move onto my computer as I would have found it so much easier to make a neater, more satisfactory (to me) result. However, I continued to resist this and initially tried using a dip pen and ink, but found this much too challenging and I was not happy with the results.
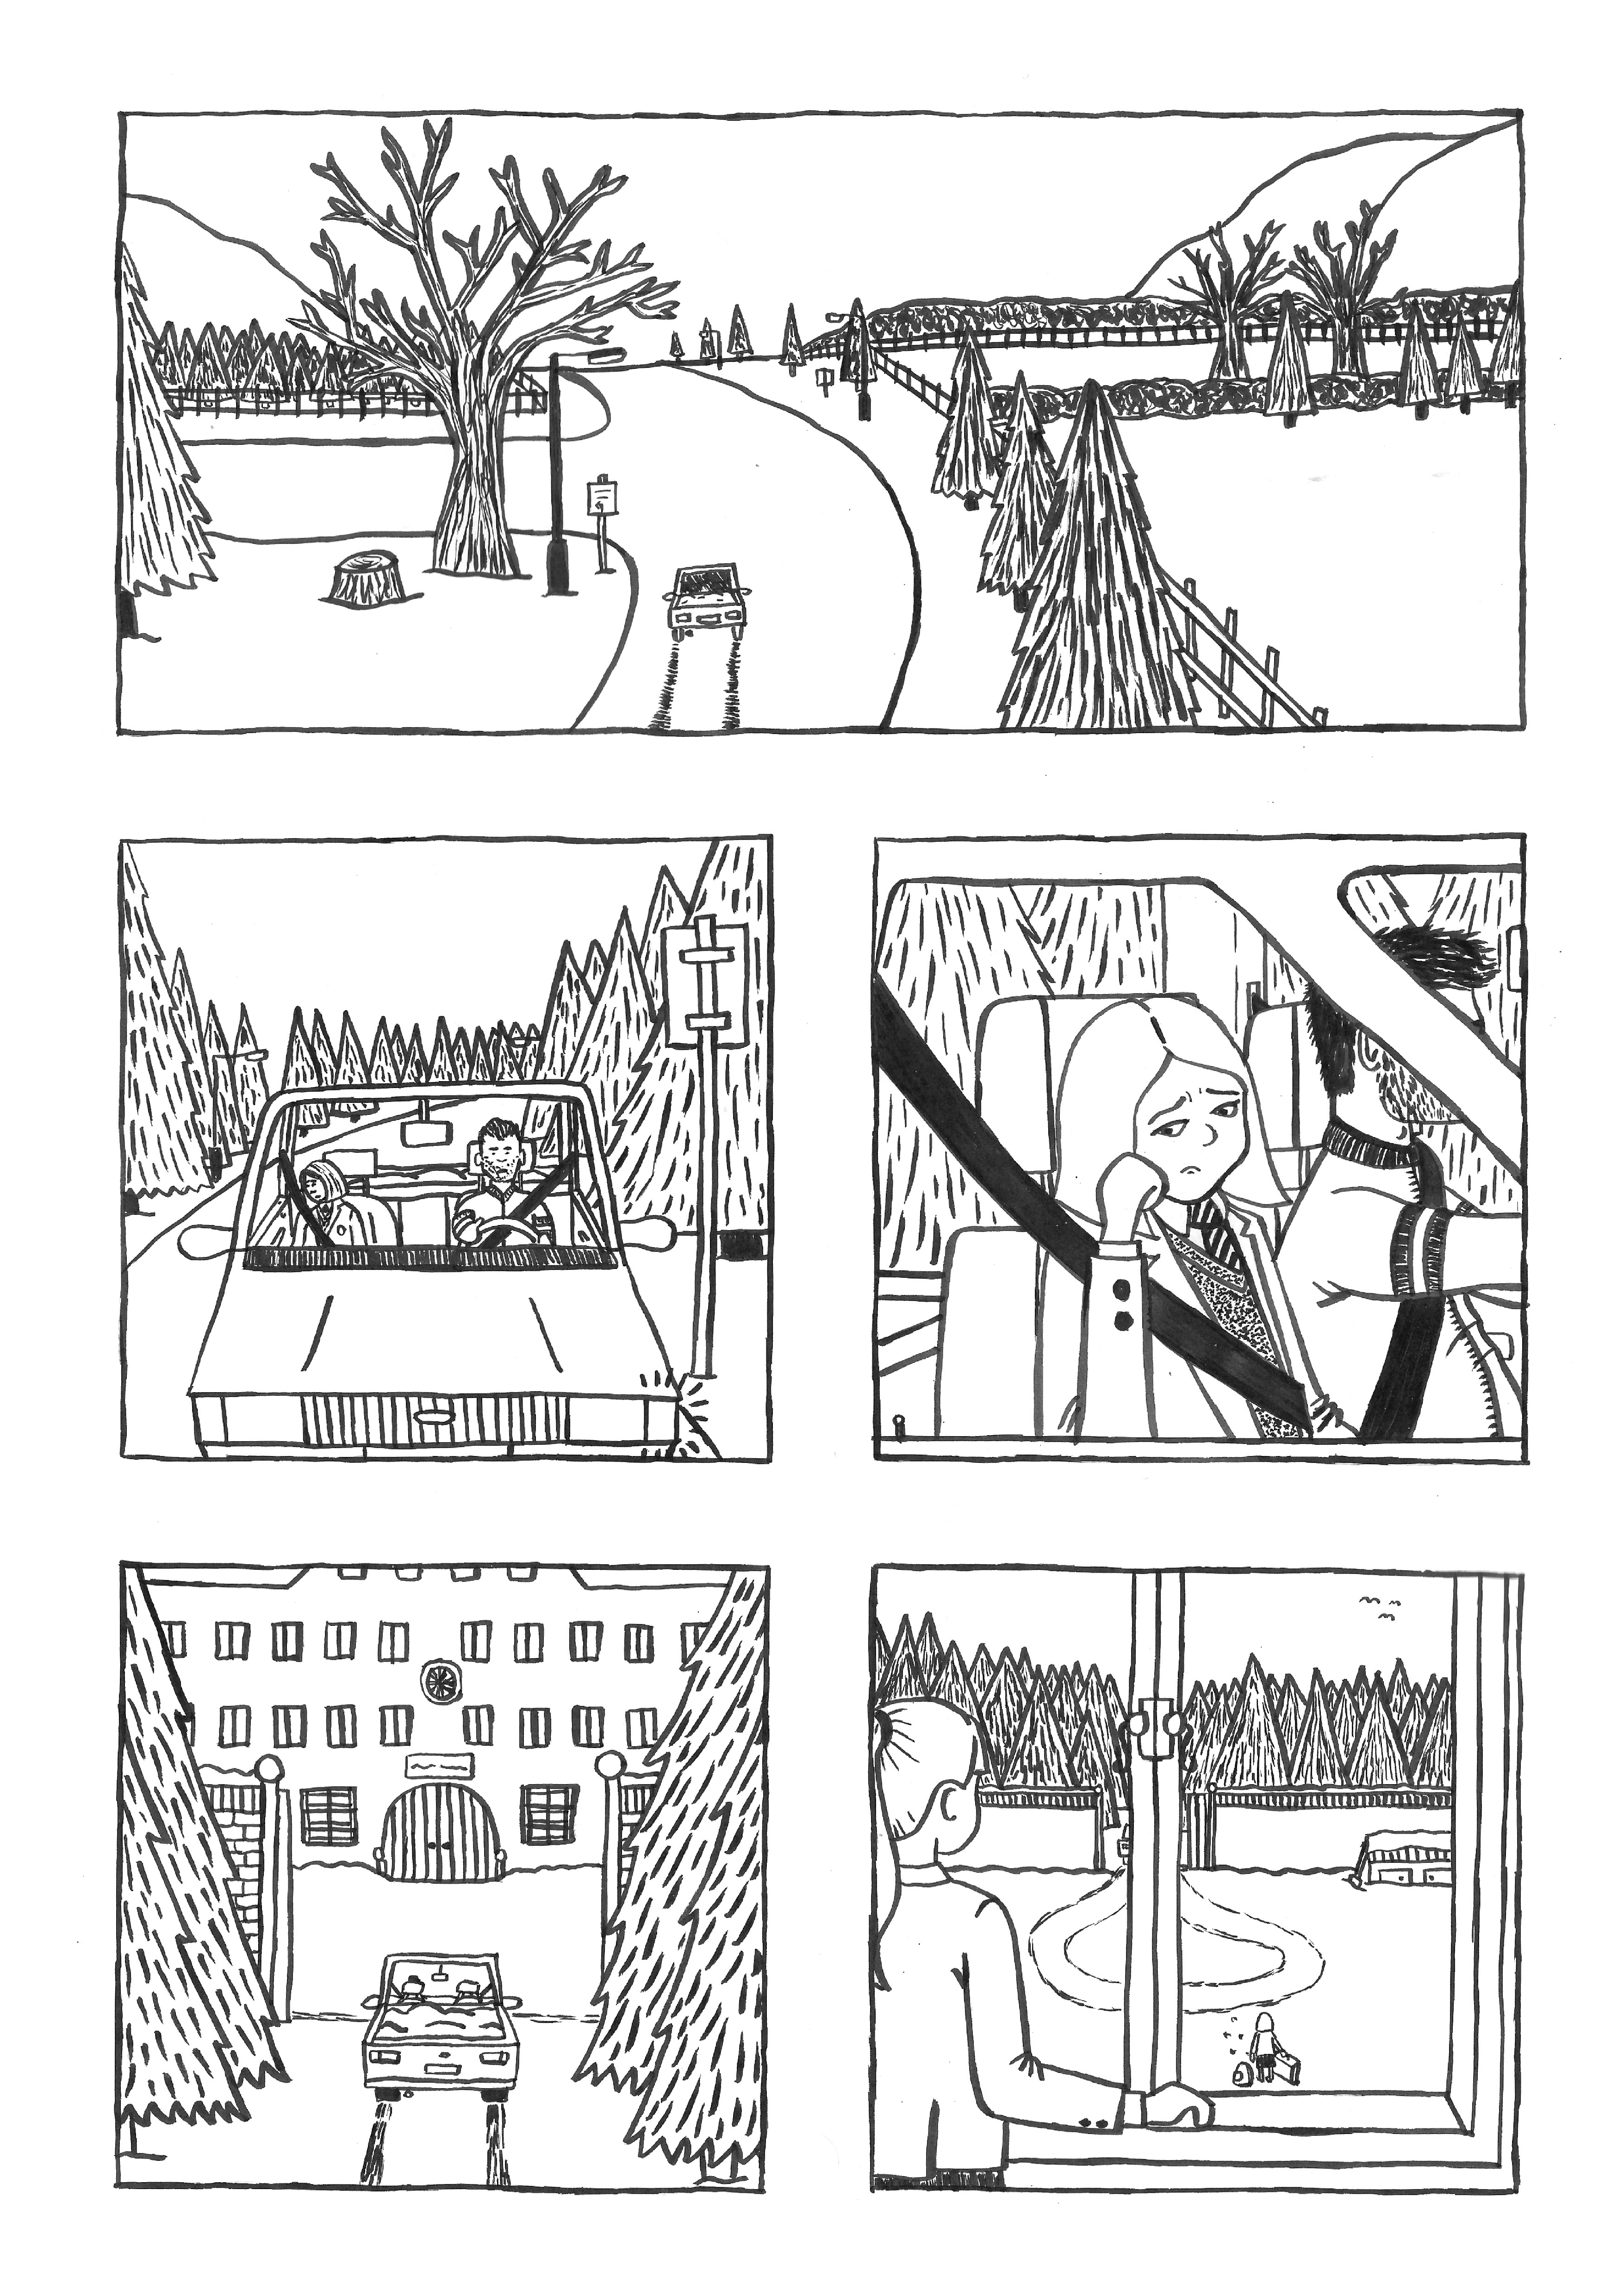
After some further deliberation, I decide to purchase a brush pen as I had seen some examples of these being used and the style really appealed to me. The result of using one of these pens can be seen below.
Final Thoughts
I felt I became more confident using the brush pen as I progressed, it took a while for me to get used to varying the pressure and angle to create a variety of lines. I kept finding certain things that I would like to have corrected/changed and I still found it difficult to relax when I knew each mark was permanent (unlike digital), which led to having many regrets of my choices. I was also quite conflicted as I was not sure if it looked too simplistic and amateurish. Part of the challenge I discovered when using the brush pen was that it is quite challenging to add detail on a small scale. Out of all the panels, I was semi-happy with the second one, apart for the girl’s head/face, and the third, although I would have liked to change the angle of the girl’s arm.
I kept reminding myself that I was really inspired by Vera Brosgol’s Anya’s Ghost, a suggested read by my tutor, which although obviously much, much more skilled than my attempt, demonstrated how simple lines and limited detail (particularly in the backgrounds) can be used to create really visually appealing work. I also felt I was influenced by Marjane Satrapi’s artwork in Persepolis. Another comic book artist I discovered after reading the suggested extract in the Reading Point for the exercise was Seth. Again, the use of ‘simple’ style and limited use of colour in his work really appealed to me.
Overall, I enjoyed this exercise, particularly devising a story based on the initial sketch and working out how to convert an idea of a sequential series of images in my head to a visual representation. I was also pleased with how I managed to develop my work from an initial rough version on lined paper to the final piece using a brush pen on A3 paper. It is my intention to continue using the brush pen and exploring how this can be applied, as I (hopefully) grow more confident using one.
References
Lambiek Comiclopedia, (2020). Seth. [online] Available at: https://www.lambiek.net/artists/s/seth.htm [Accessed 20 September 2021].