Assignment 2: Thinking of You
BRIEF
Create a range of cards for sentiments or events that are worthy of a greetings card, but are currently not catered for by card manufacturers. The cards could be linked to other calendar events, obscure Saint’s Days, sporting calendars or any other happening that is worth celebrating or commiserating.
You will need to design the cover of your card and the message inside . You may choose to include the envelope within your design work as well as explore the possibility of pop us or other forms of cards.
At least three finished cards will be produced, which can either be unrelated or work as a series linked to the same sentiment. Base the dimensions on a size of envelope that you have available to you.
ANALYSING THE BRIEF
KEYWORDS
I initially read through the brief a few times to make sure I understood what was being asked of me and then noted down the keywords:
Range of cards, sentiments, events, worth of a greetings card, currently not catered for, design the cover, message inside, envelope, pop-ups/other forms, at least three cards, unrelated or work as a series, base dimensions on size of envelope.
Goal of assignment – to design and produce at least 3 greeting cards that cater for events/sentiments that are not already well-recognised in the greeting card industry.
TARGET AUDIENCE
The target audience was not specified in the brief and therefore was dependant on which events/sentiments I chose, so until this decision was made the target audience could not be defined. I did decide at this stage that my designs would initially be targeted for online sale (if it was a real brief).
PLANNING
PRINTING
I had the choice of either printing the cards on my colour printer (not a particularly high-quality one) or sending the designs to a professional printer. I used my printer for viewing draft versions of the cards. I researched various printing companies, but most required that at least 30-50 copies were ordered and would be quite expensive. After further research I chose to use Redbubble, as to order one card (100mm x 150mm) costs £1.50 which was more affordable. It also meant I could order a couple of draft versions before finalising the designs. If the cards were to be accepted in ‘real life’ by the client, a professional printer would be used for bulk printing. For that purpose, I found a print shop called SixPrint, which provides templates and offers various paper/envelope options. Handmade or mixed media card would cost more to produce on a large scale and this cost would have to passed onto customers.
COLOUR
No restrictions for colour were specified in the brief, but I would need to keep in mind that the final designs would be printed in the CMYK colour model (however, this is not a requirement for printing through Redbubble – designs are uploaded in sRGB mode).
DESIGN ELEMENTS (E.G. ILLUSTRATIONS, PHOTOGRAPHS OR DIAGRAMS)
The brief did not specify or supply any design elements, so these were dependent on my choice of event/sentiments and I created/supplied them.
BUDGET
The budget was not defined in the brief. The most significant cost was printing out the colour designs – both on a personal colour printer (ink and paper) and ordering prints. Any cards that incorporated handmade elements would result in higher costs (materials, etc).
SOFTWARE
The software used was dependant on the type of design, but as mine were to be vector illustrations I used Illustrator. I intended to use InDesign for the final layout and I did experiment with rough layout ideas. However, printing for Redbubble only requires a jpeg or png of the front design so I found Illustrator worked adequately for this. If I was to print via a professional printer I would definitely use InDesign as I would need to have all four sides of the card in the layout.
PAPER
I found there to be a wide variety of greeting card sizes available and not many seemed to be the standard A5 or A6. I decided that as my illustrations would be vector-based, and therefore easily resizable, I would set my artboard at A5. This was a suitable size to work with comfortably and for printing drafts on my home printer, as I felt A6 would be slightly too small.
In terms of which paper/card I would use, I used copy paper for printing off the drafts. Redbubble does not have different options for paper/card, but SixPrint has various options available and I like that the paper is responsibly sourced:
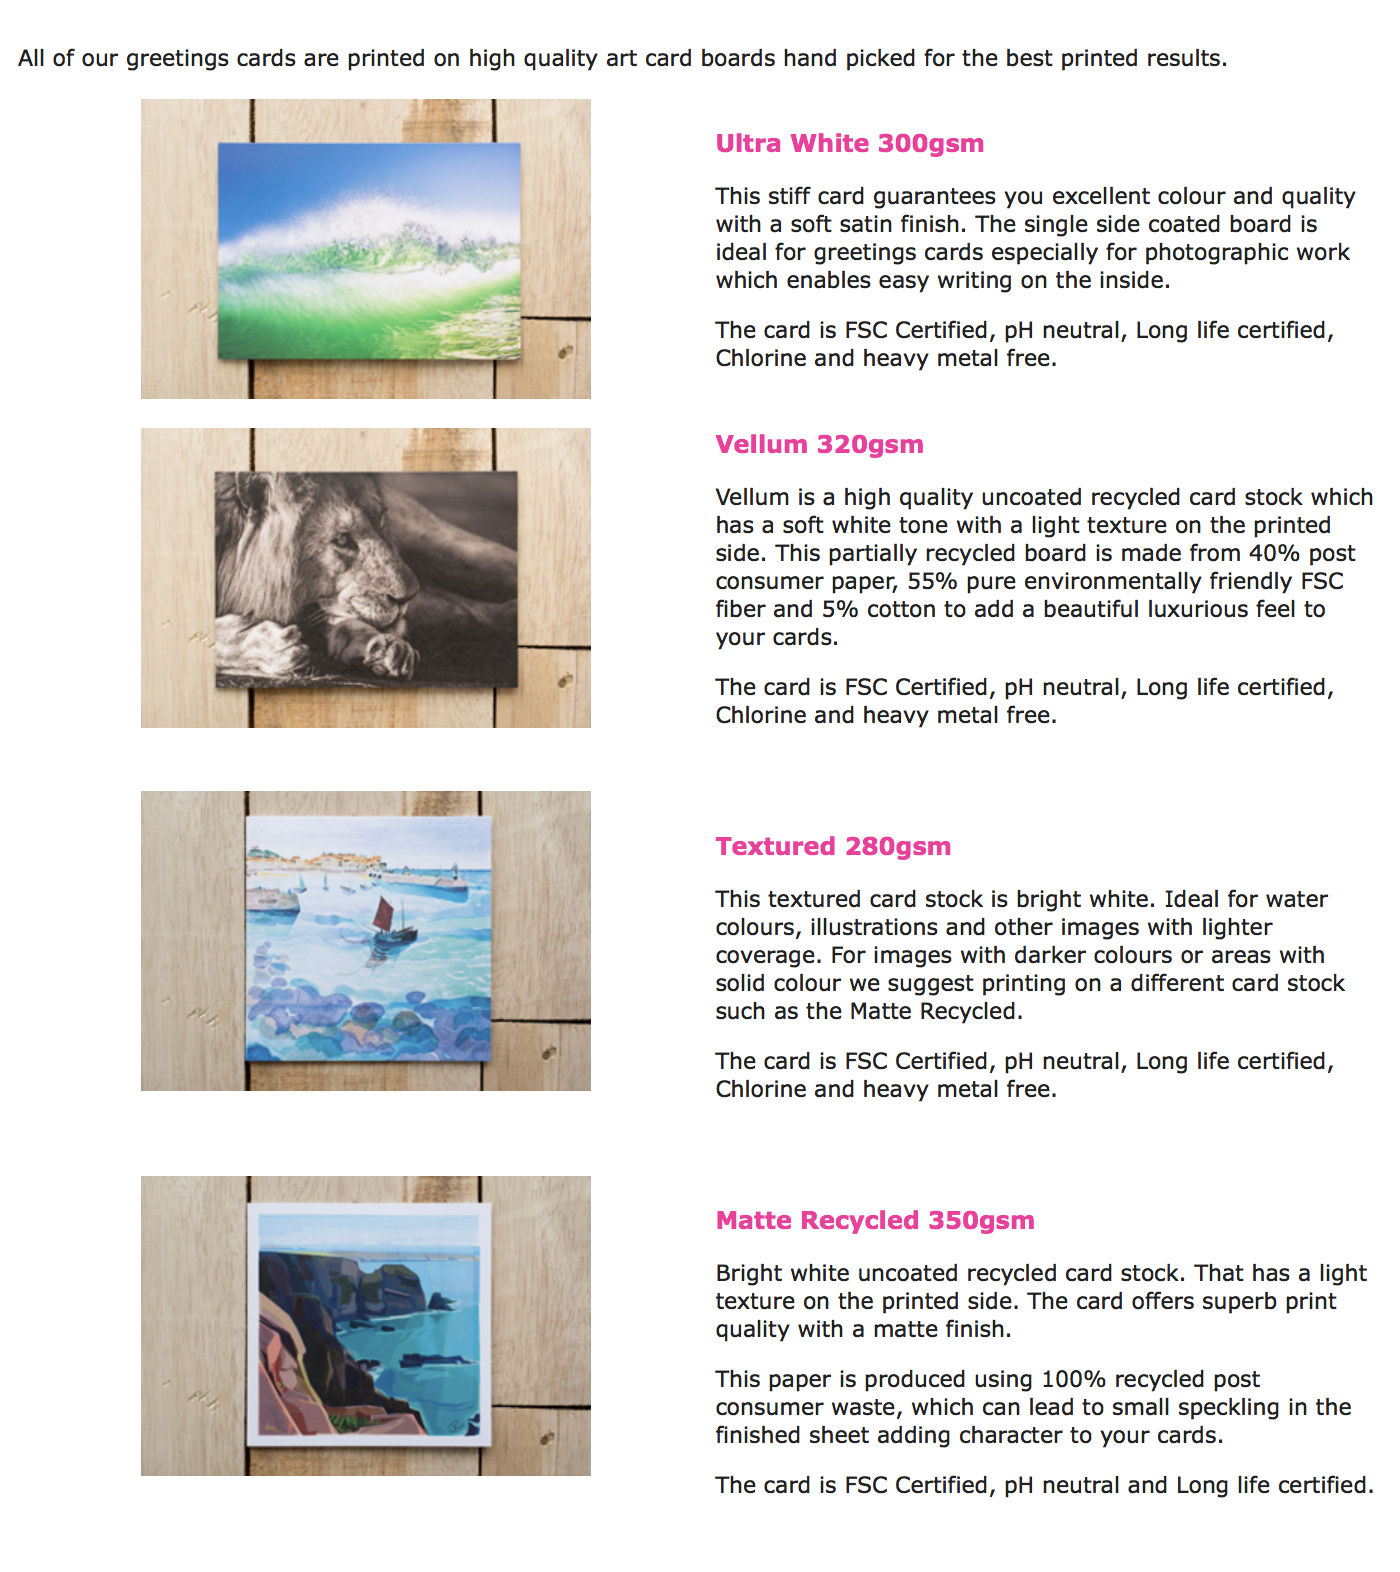
I would ask them to send me samples so I could compare the different options.
RESEARCH
I considered what aspects of this brief would be most challenging and how I could overcome these issues:
* No experience in producing greeting cards to a professional standard – read books/online articles on the subject; researching the requirements imposed by greeting card companies; and learn through trial and error.
* The requirements for designing for print – ensure finished work set in CMYK colour model and use the appropriate resolution (300dpi).
* Unfamiliar with InDesign – continue watching/completing tutorials for InDesign.
* The greeting card industry – visit website of various companies and research the history.
* Which events/sentiments are not currently covered – visit card shops and/or search online card retailers to clarify what ones are catered for. Then list which potential events/sentiments to explore for the designs.
* Using contextual/historical influences in my designs – continue reading about the history of graphic design and become more familiar with different styles/artists.
PRIMARY RESEARCH
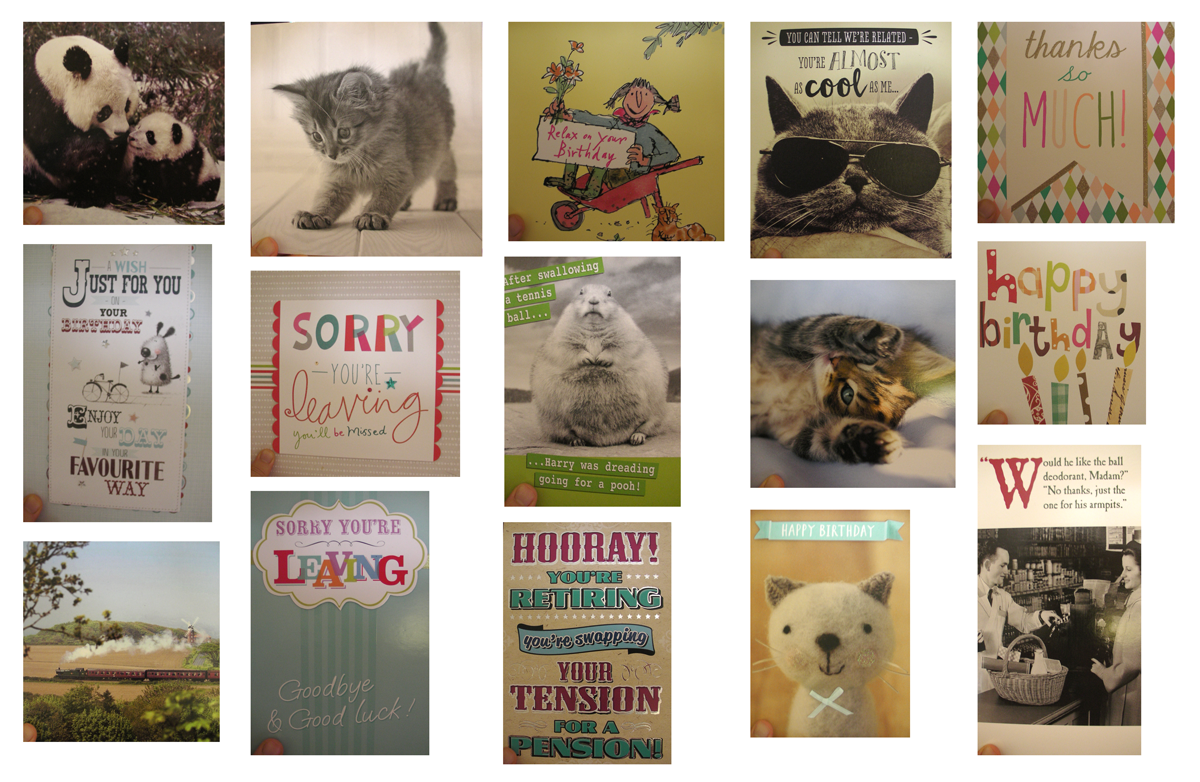
Although I was going to be aiming my cards for an online audience, I visited various high street retailers (WH Smith, Sainsburys, Waitrose, Tesco and Marks & Spencers) that sell greeting cards and took note of design aspects of the cards, any trends and which sentiments/events are catered for.
The main sentiments/events that I found were:
- Happy Anniversary/Engagement
- Happy Birthday (including those for specific Age, Children, Mum/Dad/etc.)
- Congratulations
- Good Luck
- Get Well Soon
- New Baby
- New House
- New Job
- Retirement
- Thank You
- Sympathies
- Invitations – e.g. Weddings, Parties
- Missing You
- (Christmas Cards)
- Blank Cards (i.e. with a generic photograph or illustration on the cover, but no event specified by text)
There was an assortment of sizes available and the designs ranged from the whimsical to the garish, with more moderate ones in between. The cards either had photographs, an illustration (whether cartoon or realistic) or just text on the front. The more expensive options tended to be larger and have additions such as badges, cutouts or materials stuck onto the designs. Most of designs were portrait in orientation. The typeface on the cards was generally in cursive or novelty style. I was quite surprised that many cards are still gender-specific by the use of pink and blue.
I then decided to explore the cards available online. I have taken screenshots of two well known examples below. The categories available appear to be similar.
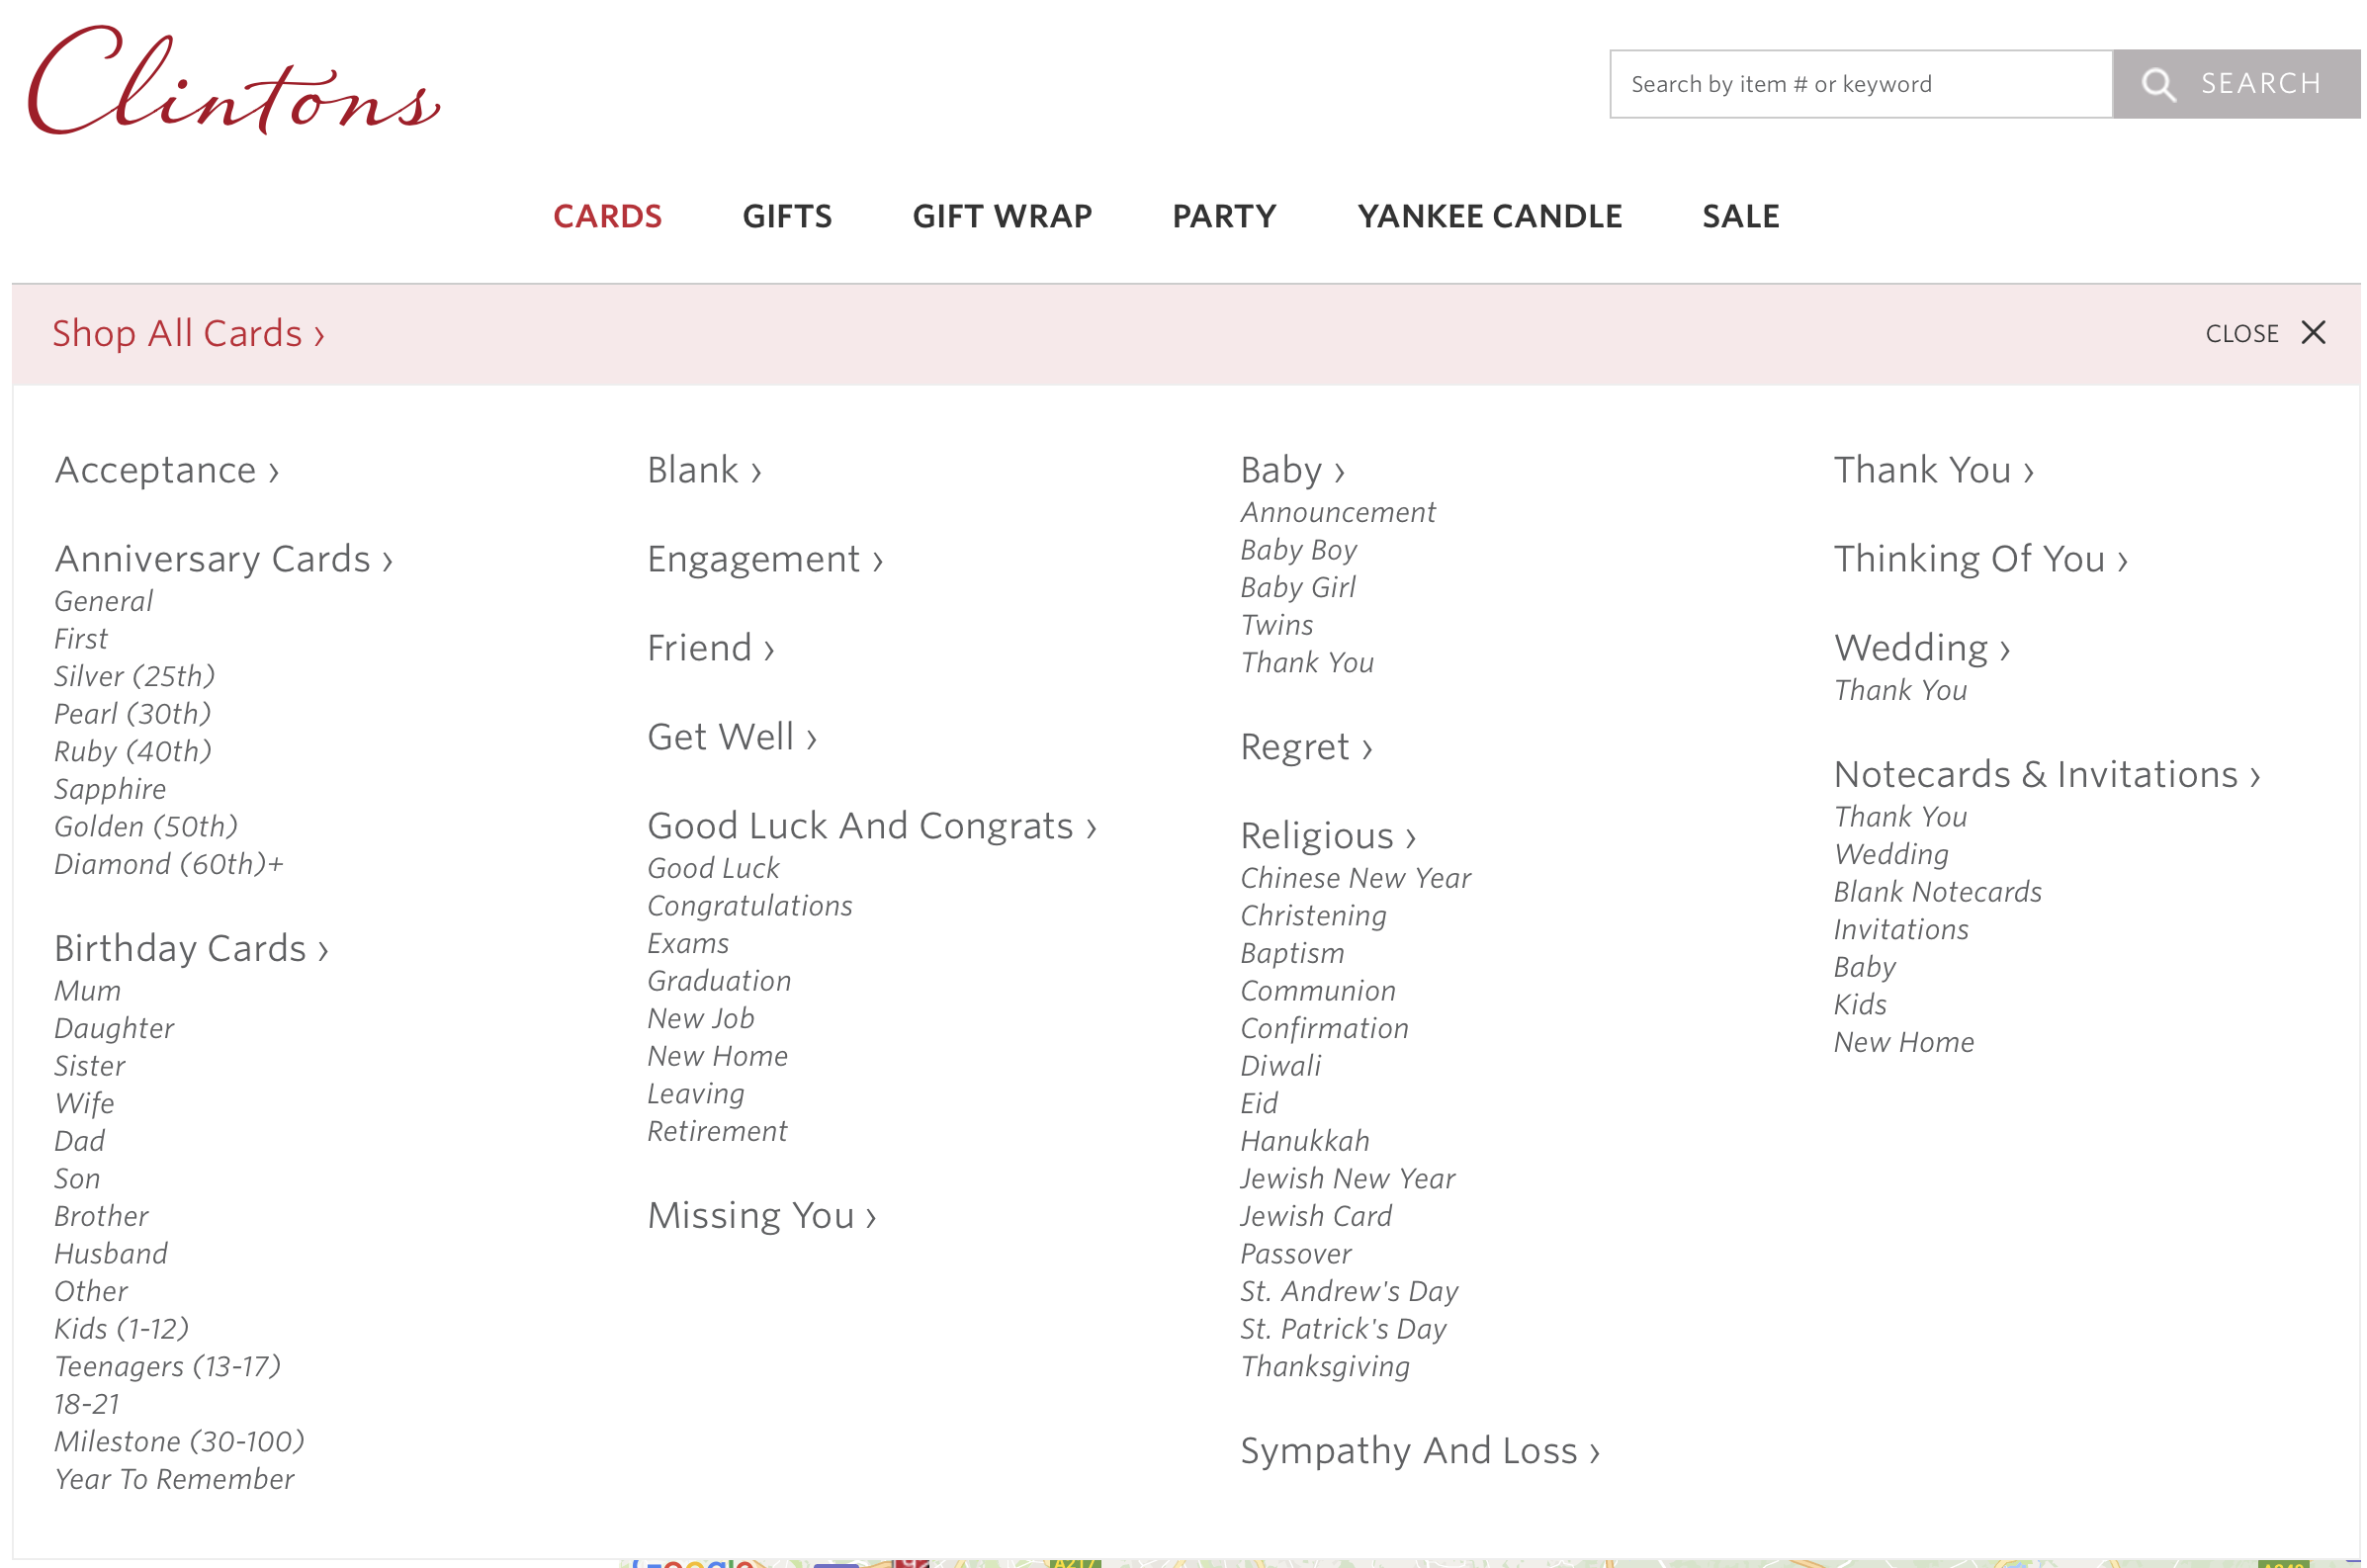
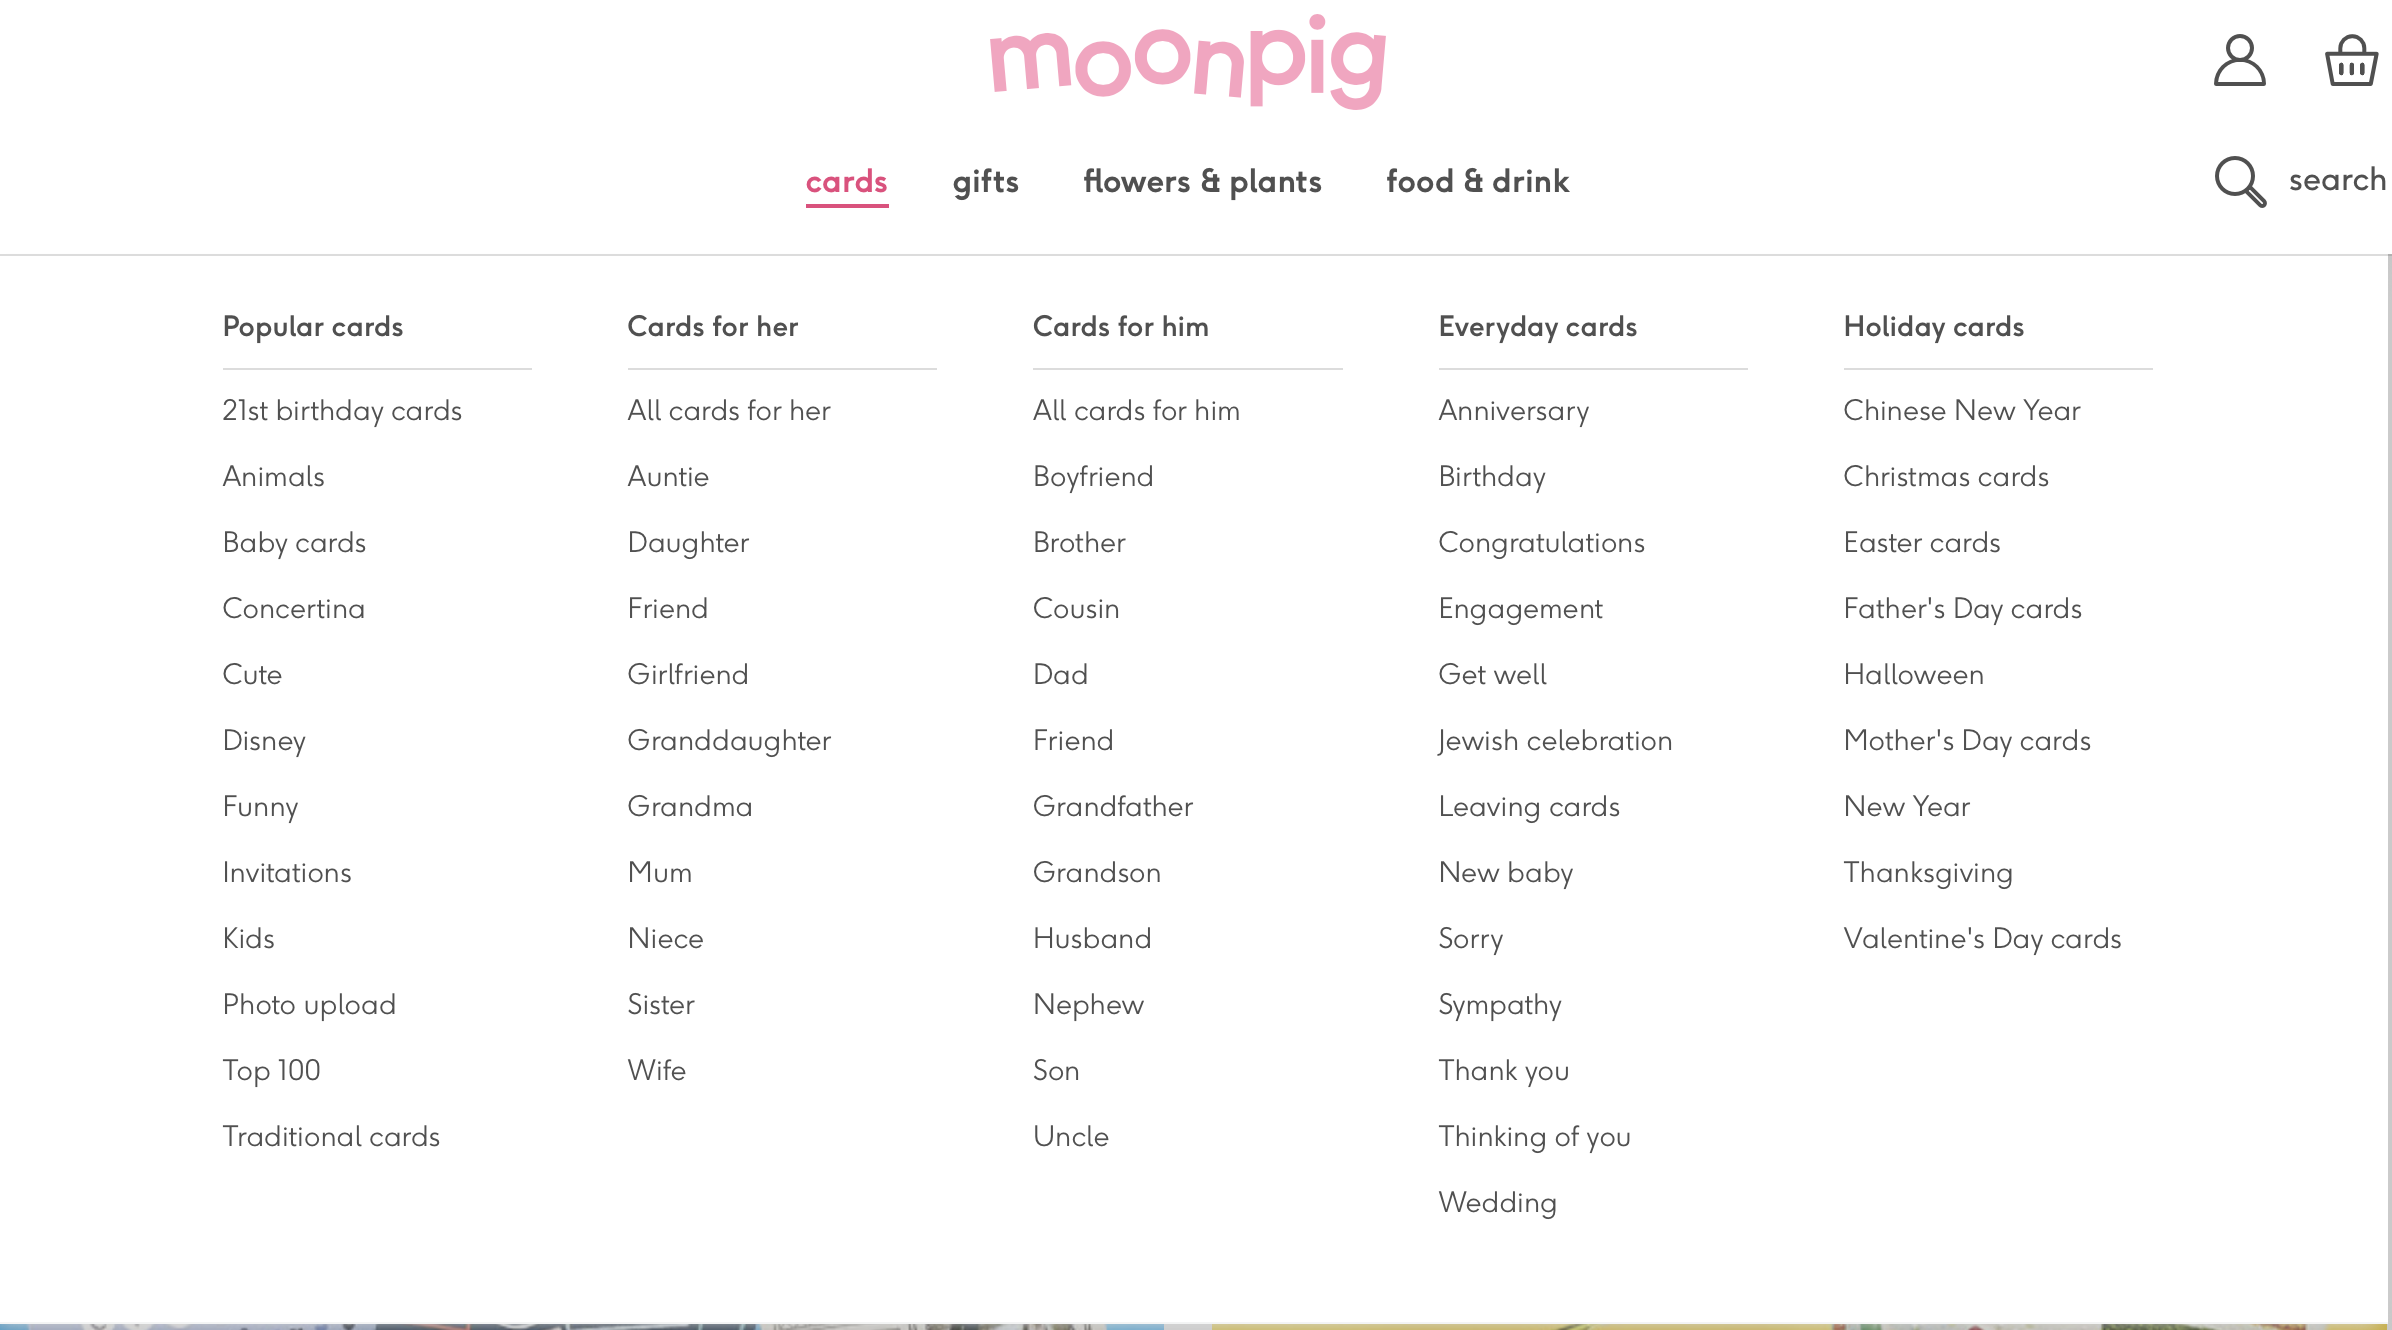
I decided the online route would be more achievable at this stage in my career as there is the option of setting up a personal online card shop (e.g. using Redbubble or similar), which could be used to gauge the potential of any designs before attempting to persuade a company to consider them. I also prefer taking my time looking at designs on well-designed websites rather than in a shop, due to better organisation, more variety and less distractions.
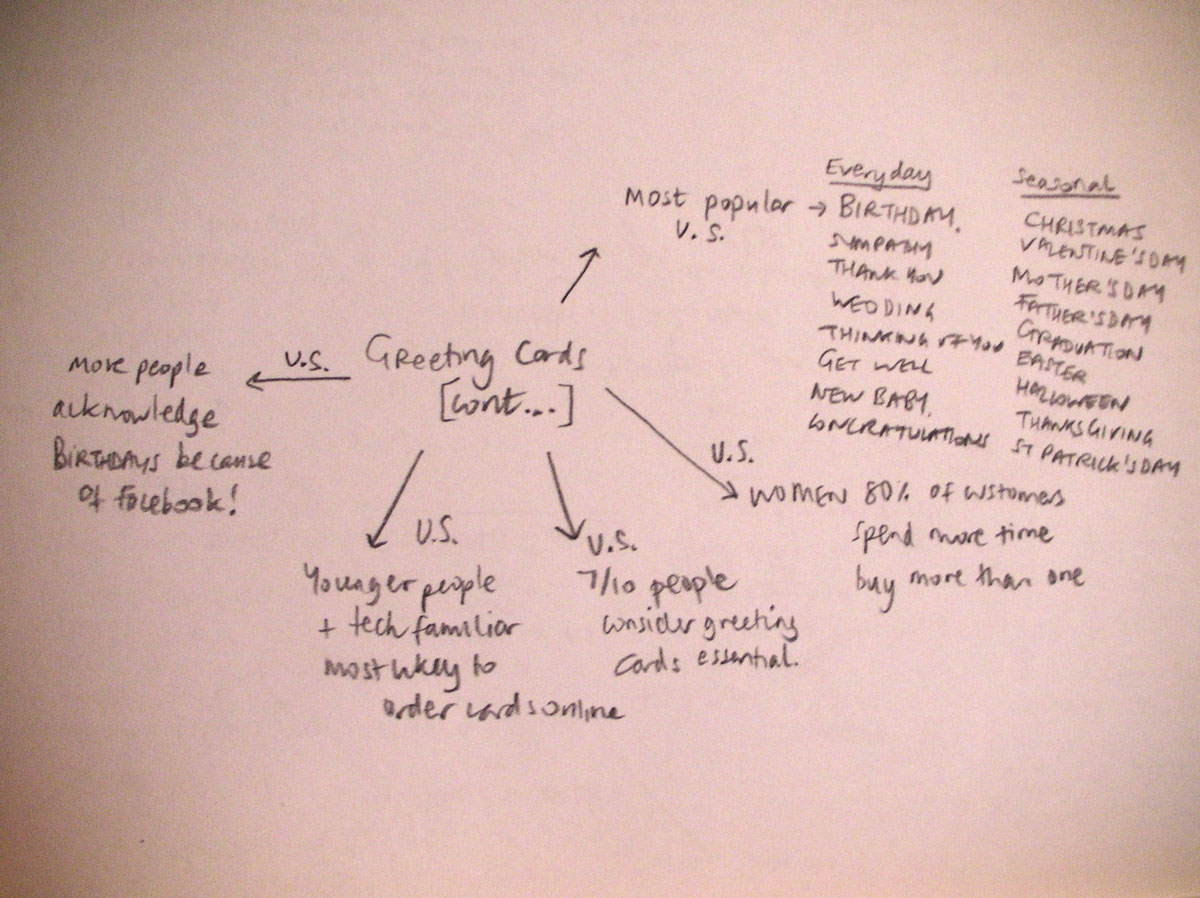
SECONDARY RESEARCH
I looked at both the Greeting Card Association (US based) and The Greetings Card Company (UK based) websites, both of which have concise information on the history of greeting cards. I compiled the key information in mind maps. Acquiring this background knowledge provided a solid foundation to build on. It was particularly interesting to learn that most greeting cards are sold to women and that they spend more time looking at the designs than men. I also looked at the UK Greeting Card Association, which has extensive information about designing cards, which is going to be extremely useful as I go forward in this assignment and also for future reference.

I created a Pinterest board with designs that I found visually appealing.
Some key design points that stood out to me included:
*Generous amounts of white space used, which makes the designs uncluttered and more appealing to the eye.
*Imaginative use of white space, utilised as part of the design.
*Handmade elements incorporated into the designs – I really liked the use of the buttons to replace heads and the snail shells and the train ticket cut into the shape of a train – I felt it added a more personal and unique touch to the cards.
*Fairly restrained colour palette – some only used one colour against the background of the card, which added an elegance to the design.
*Unless the text was in a hand-written style, most used a sans-serif typeface, enhancing the cleanness of the designs and created a less whimsical look.
*Generally the text was a dominant feature, both visually and also by reinforcing the intended sentiment – short and concise in content. Scale was also used to effect with the letters on certain cards being cut off at the edge of the cards.
*Some cards used symmetrical design, with the image/text being centralised. When asymmetry was used it created a more dynamic design, sometimes incorporating the edges of the cards.
DEVELOPING IDEAS
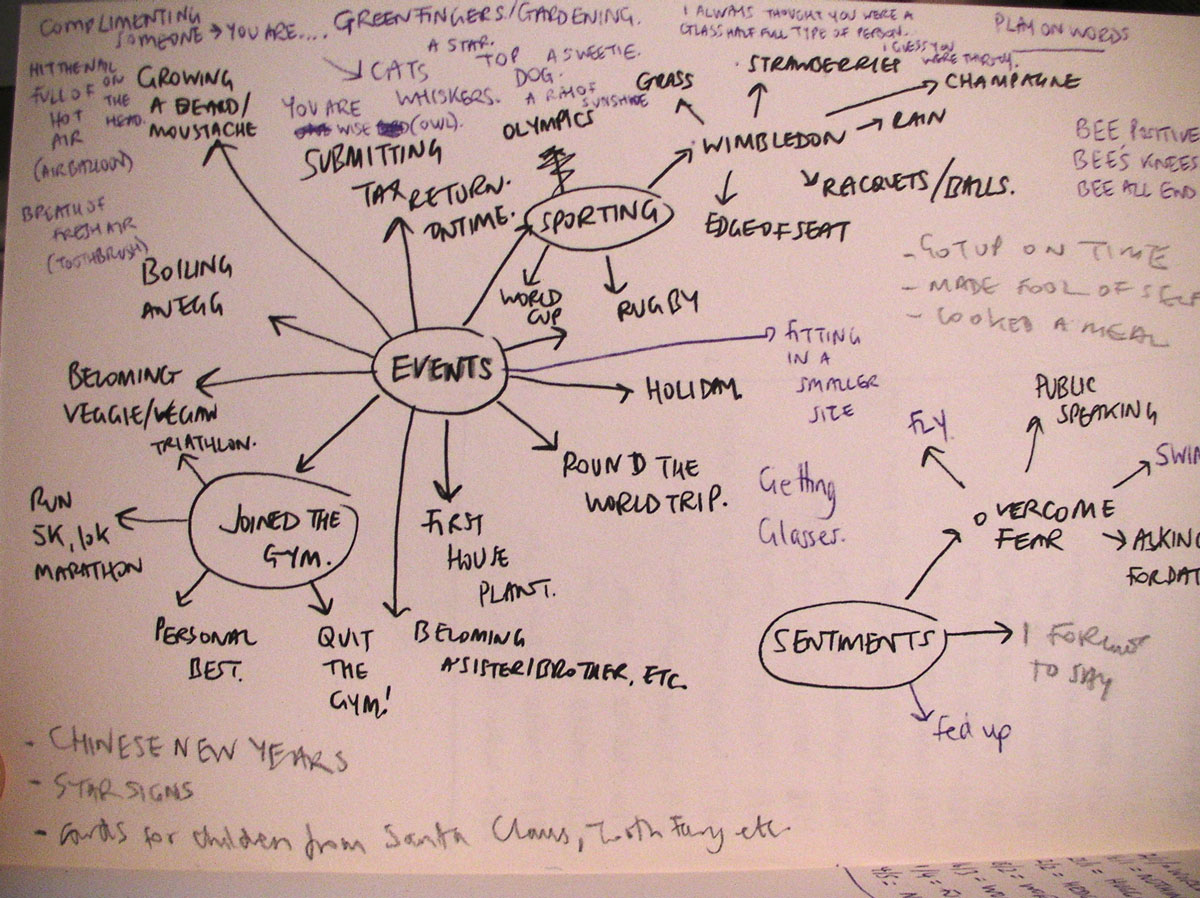
MIND MAPPING
I then created a mind map of some obscure events/sentiments that do not appear to be currently catered for. I also researched some ‘International’ or ‘World’ days, but I decided that most of them were either too serious a topic (e.g. many of those on the UN website) or are too completely ridiculous that I thought it highly unlikely many, if any, people would buy cards for (e.g. Dress Up Your Pet Day…), unless it was for charity. *However, I did later come across this article, which may prove to contradict my view.
CHOSEN EVENT/SENTIMENT
I decided to create a range of cards to give someone facing up to a particular fear or obstacle in their life. Rather than just a generic good luck card, these would cater for people who attempting to do something they never thought possible. I would describe them as ‘encouragement cards’.
I wanted my cards to be quirky and humorous, as demonstrated by the examples of artists whose work I was influenced by (see below).
INFLUENCES
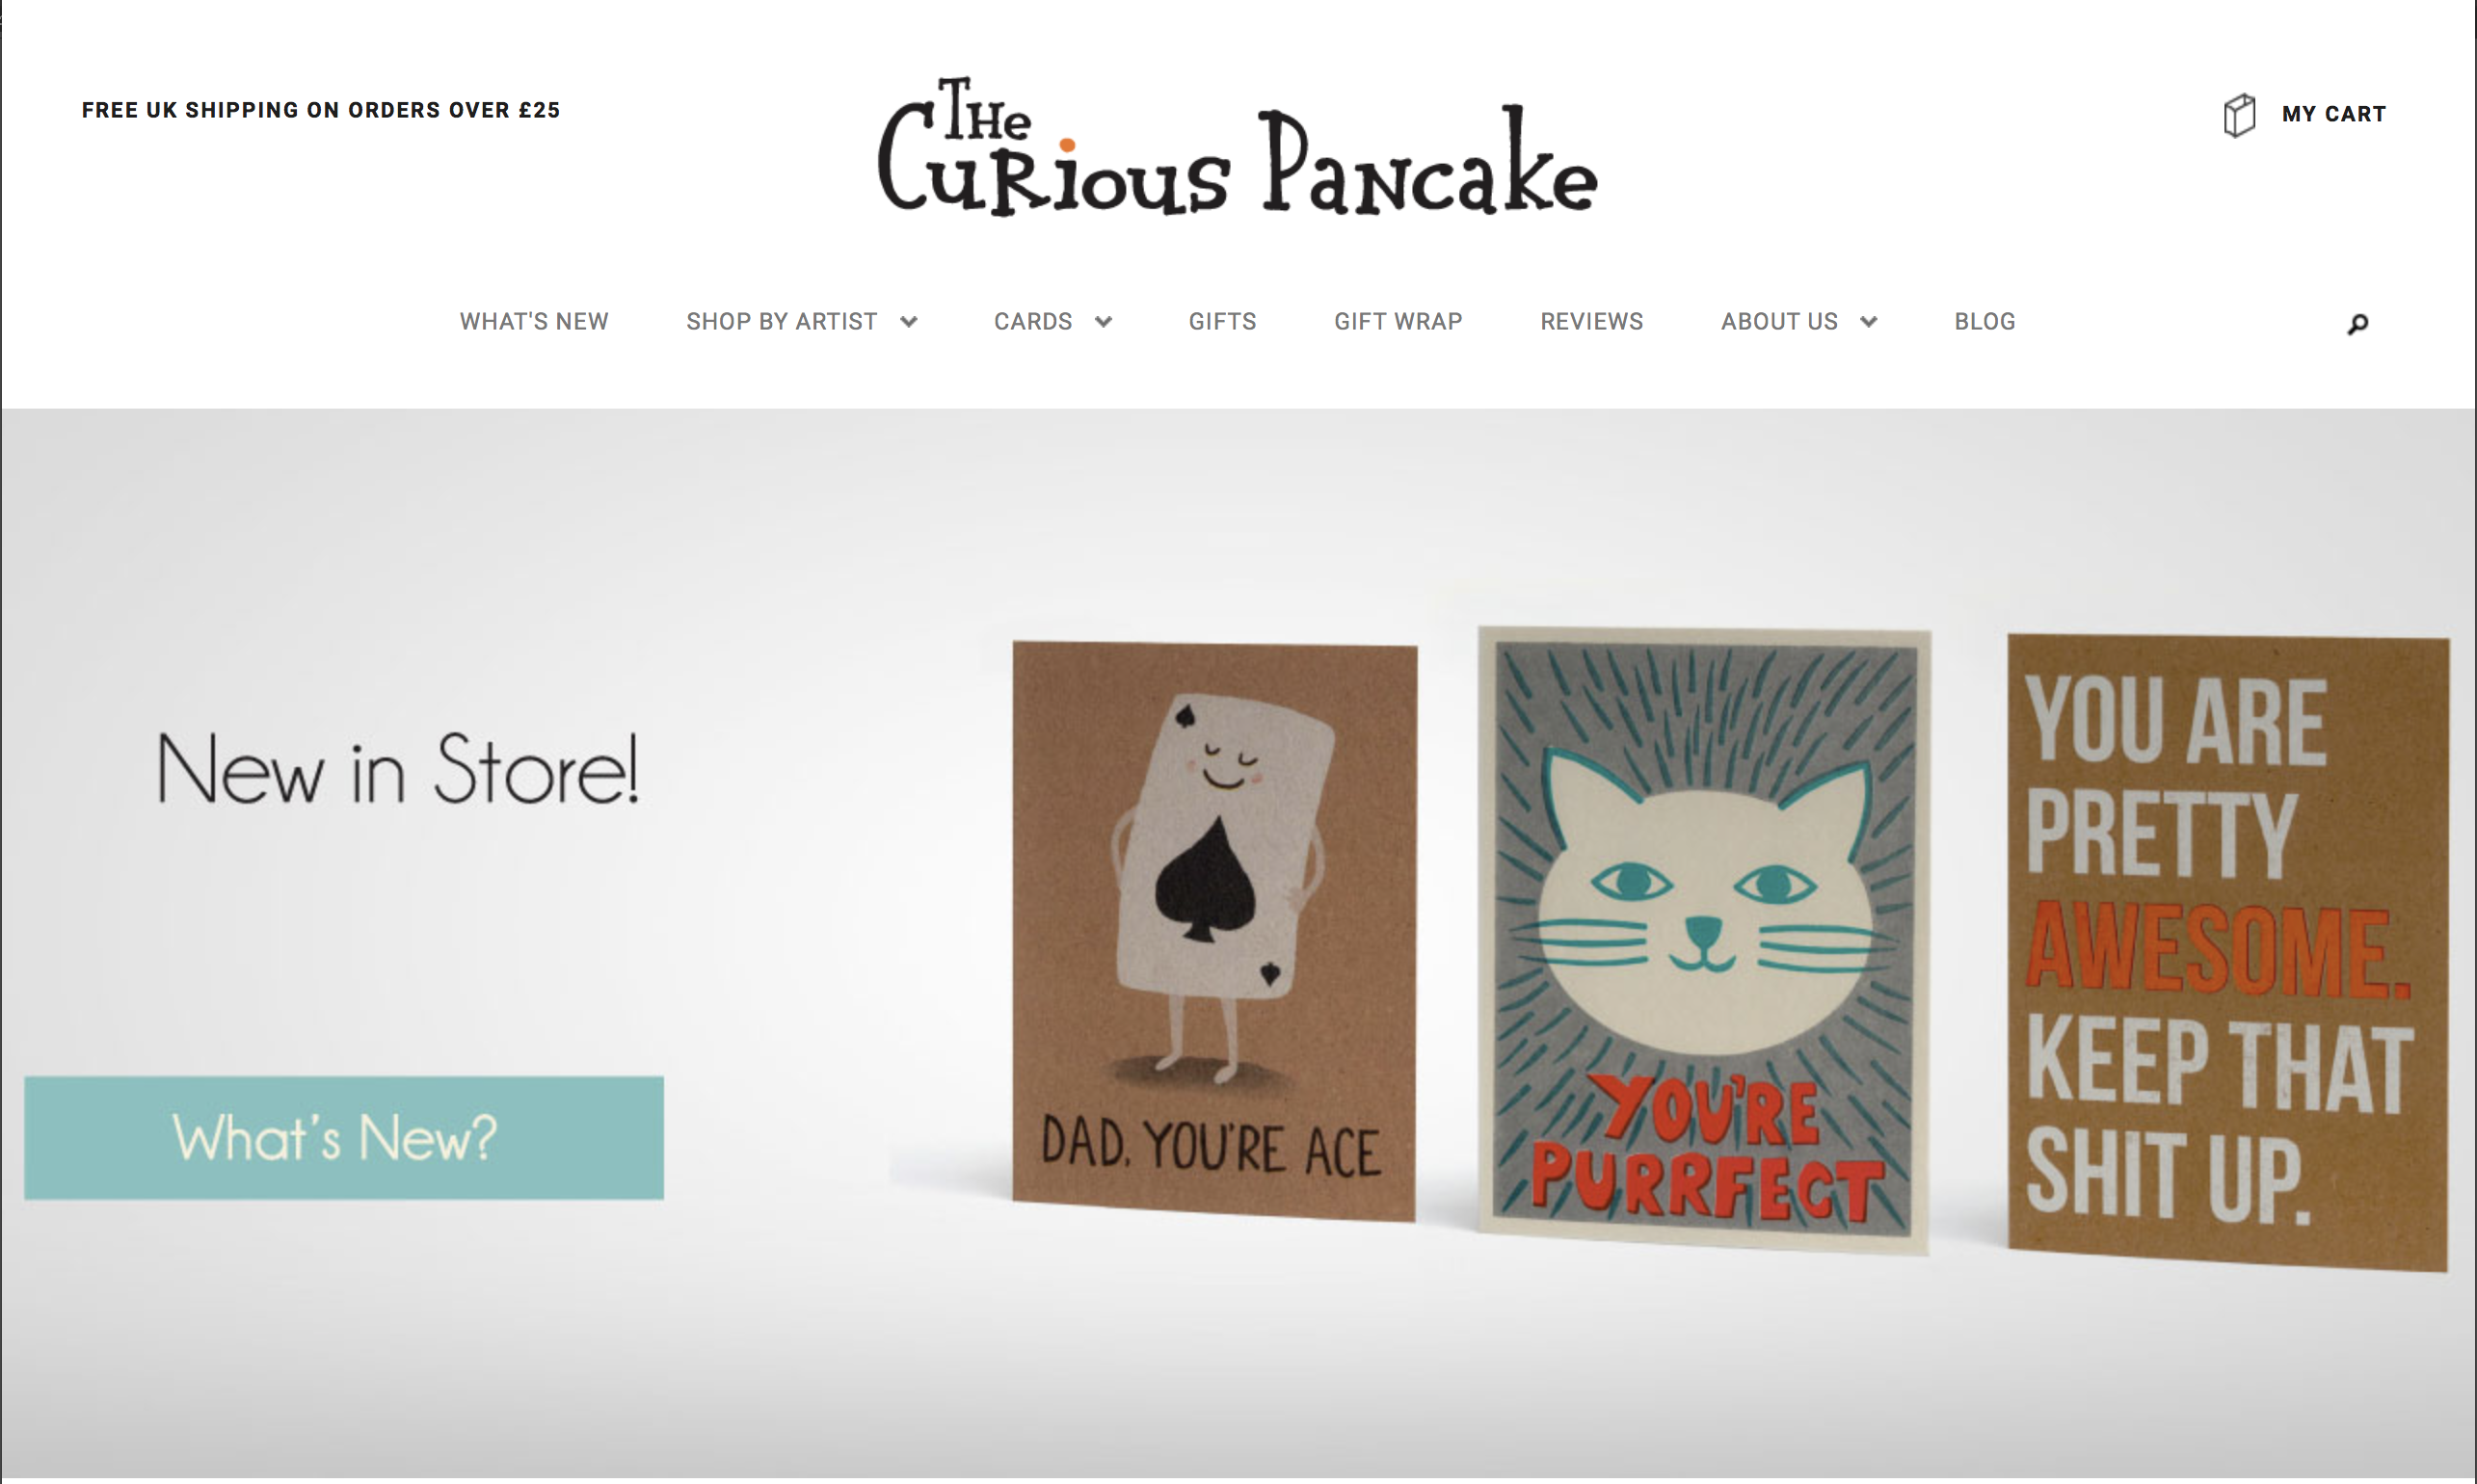
I discovered the website Curious Pancake which showcases the types of cards with which I would like mine to be grouped. I thought the use of brown card as oppose to white was an interesting idea – it makes them stand out and white can be used to different effect on these ones.
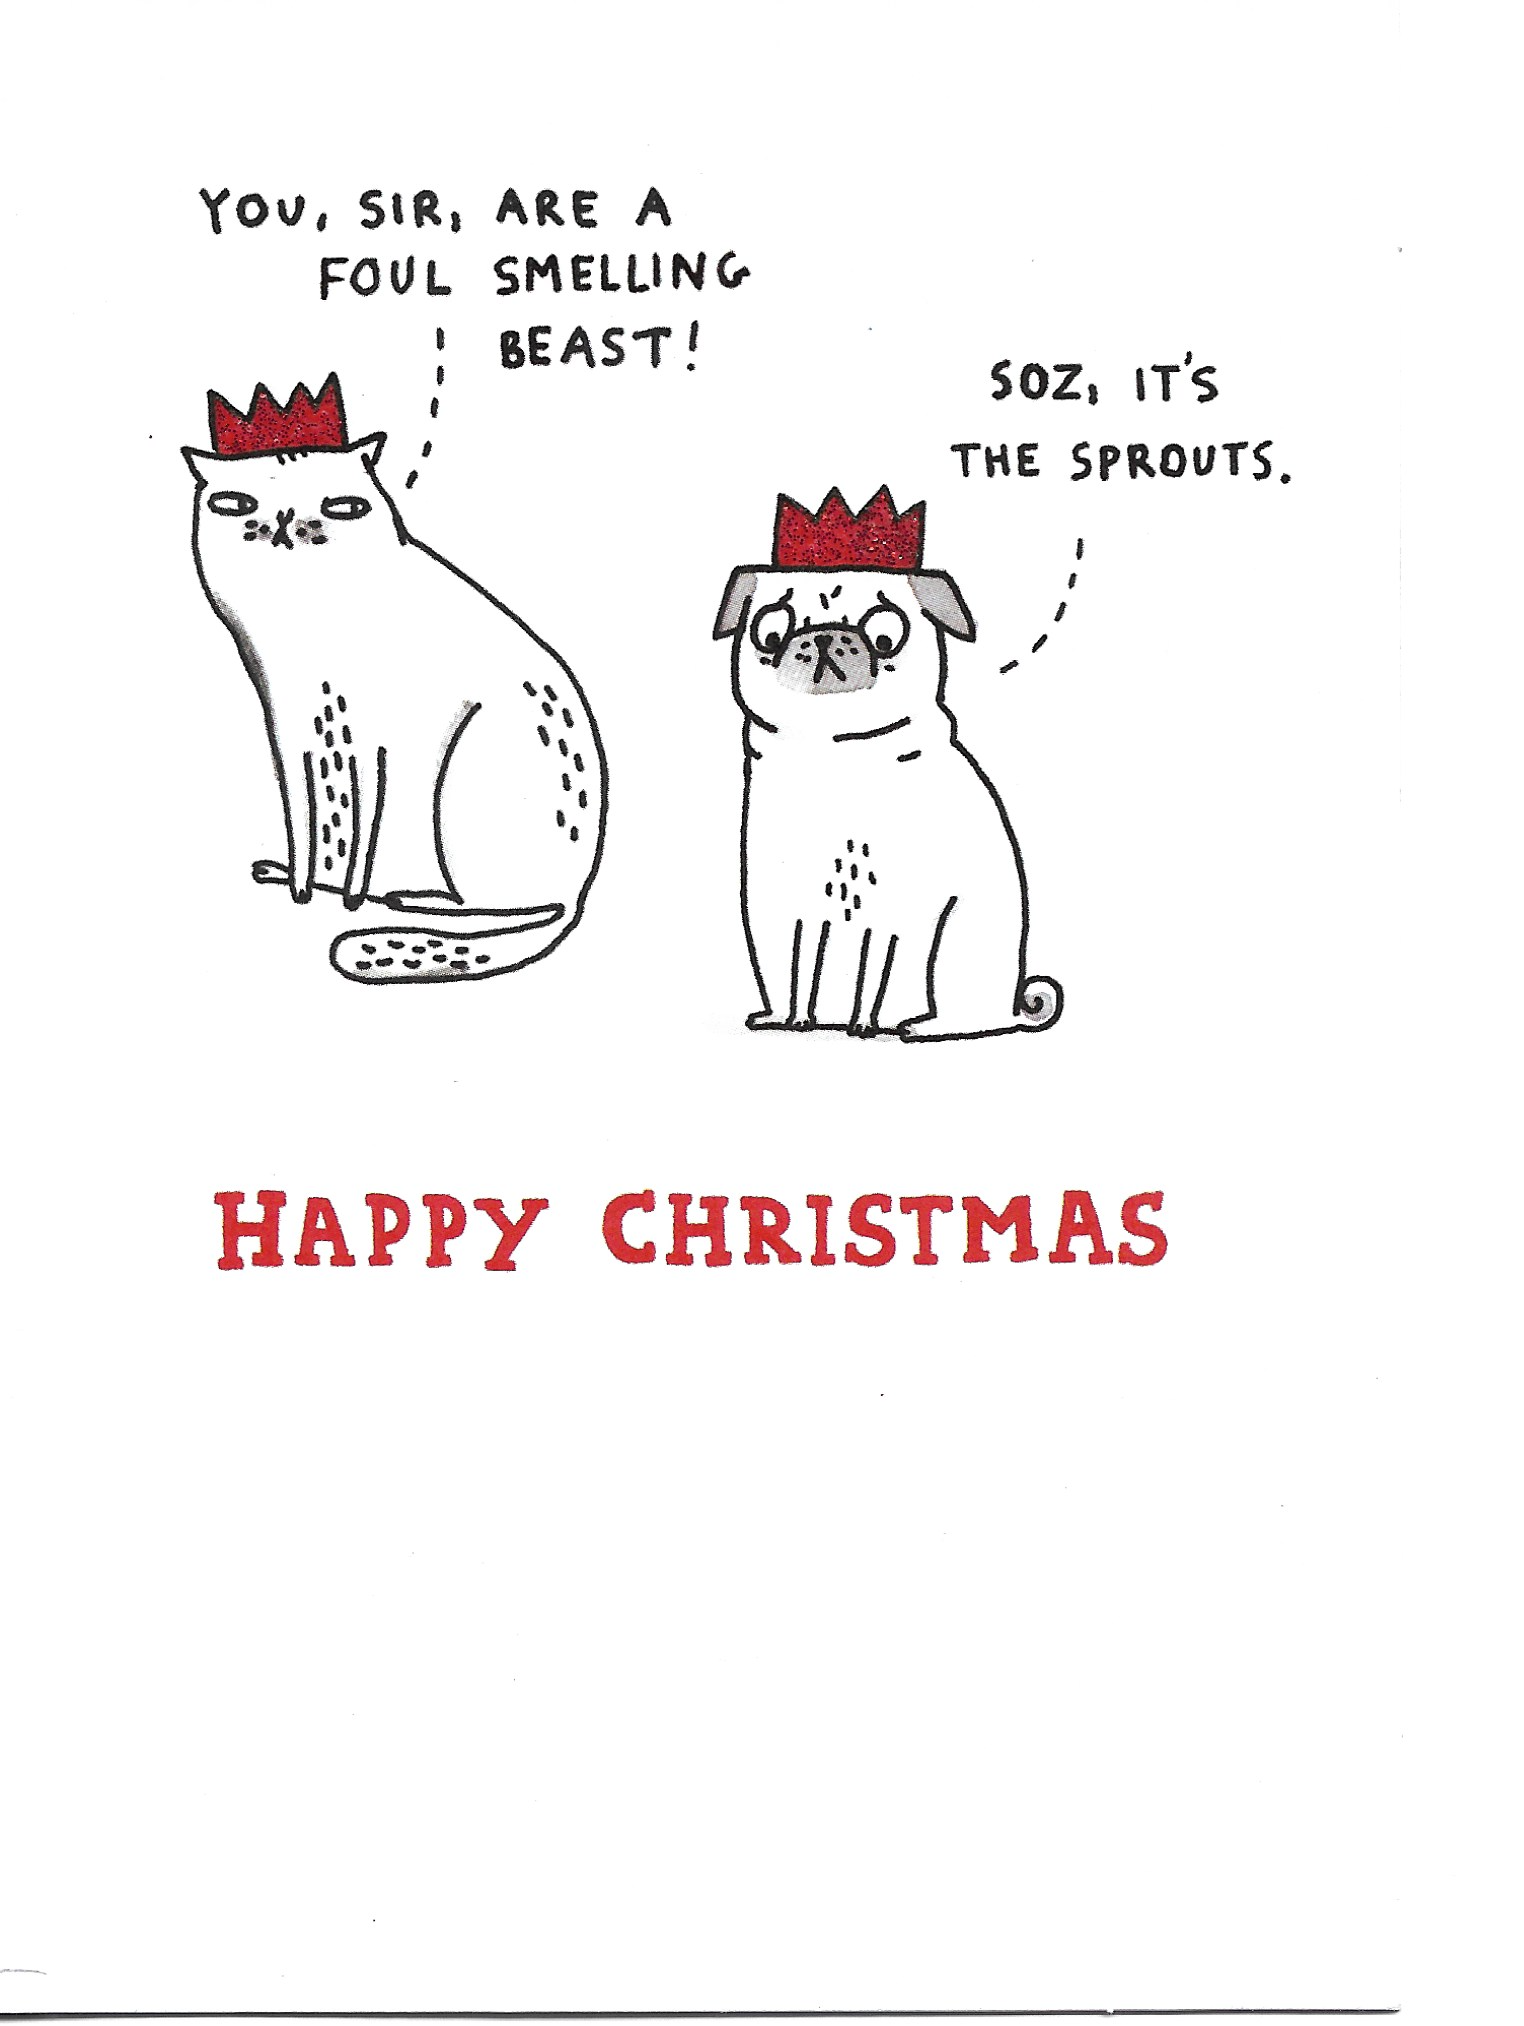
One of the artists that stood out to me was Gemma Correll. The designs are ‘simple’, but the play on words/use of puns and illustrations work really well. I also liked the colour palette Gemma uses: generally just one colour (often red) alongside the white of the card and the black outlines. The cards definitely work as a range and it would be easy to recognise them as being created by Gemma Correll’s.

I was pleased (I think) to find I was previously given one of Gemma’s cards. The hats have red glitter added to them.
I then found Quirky Paper Co., which became another favourite of mine. The use of animals in the illustrations, the humour and the clean designs all appealed to me. I thought the colour palette used created a overall harmonious effect, with no clashing or garishness.

Other artists that inspired my designs included:
Simone Lia
Kristian Jones
Tom Gauld
Pranita Kocharekar
Maja Safstrom
Their designs are based on humour and sketch-like illustrations. Following Assignment 1, I was advised to incorporate more hand-drawn elements into my work, so I intended to implement this in Assignment 2.
In addition, I created a Pinterest board with a few examples of ‘encouragement cards’ similar to what was aiming for with my ideas.
VISUALISING IDEAS
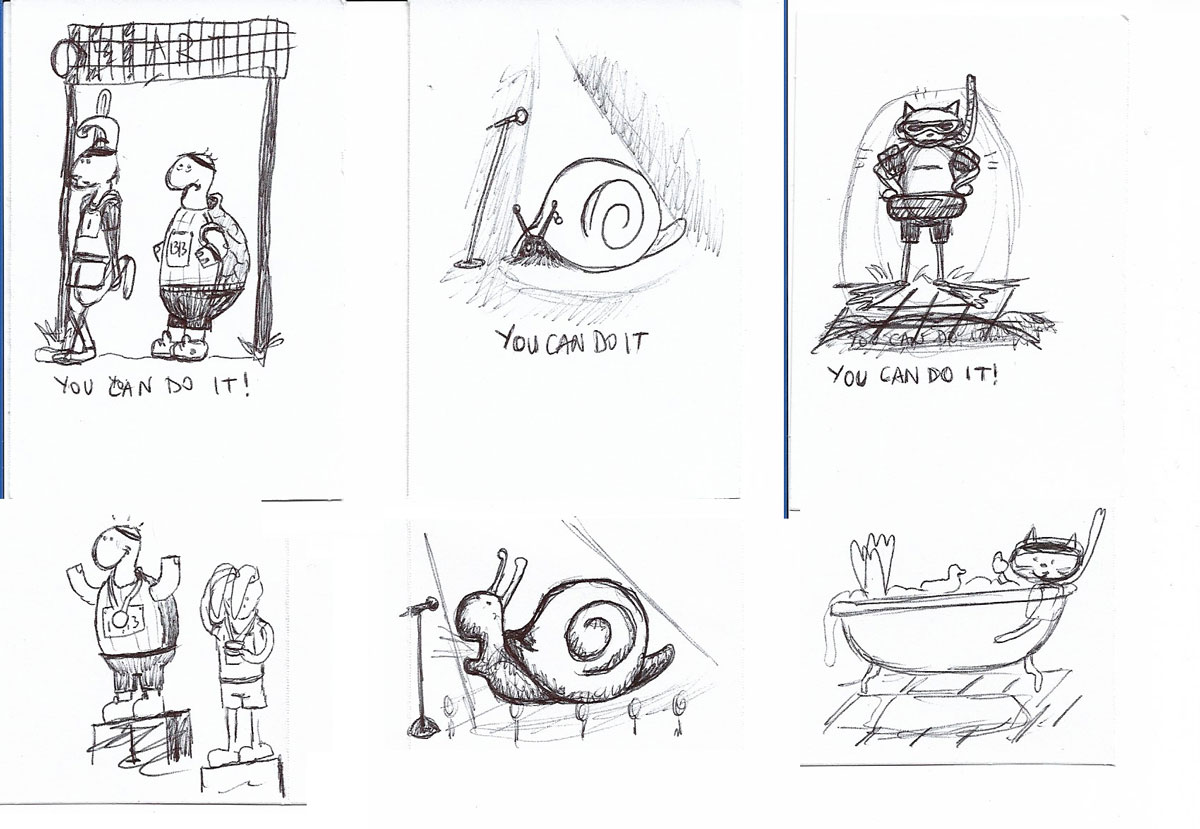
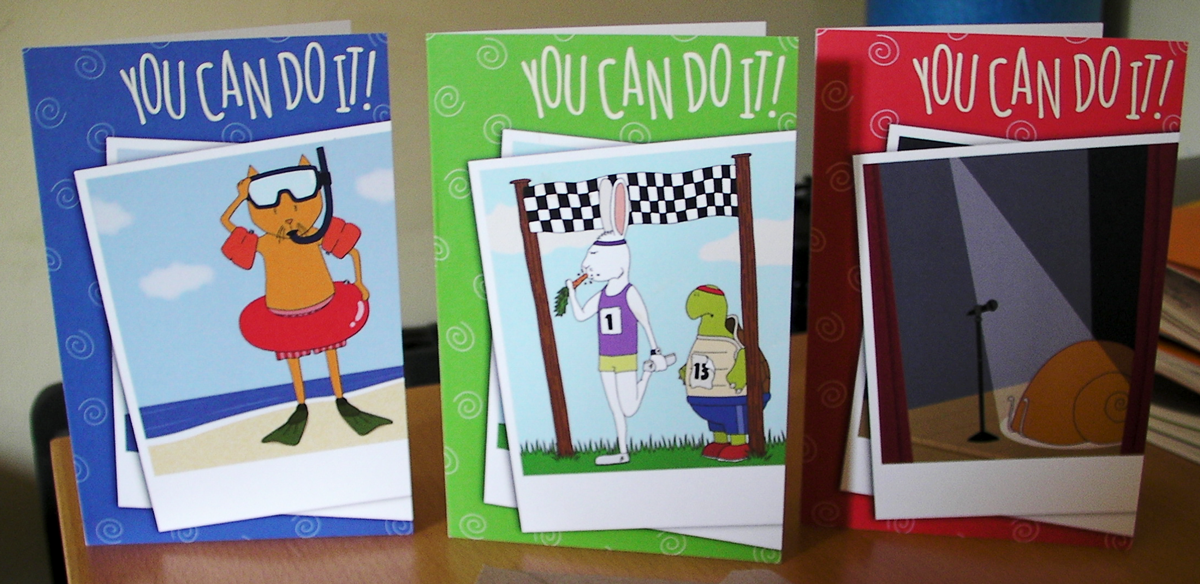
After some consideration, I decided on rough concepts for illustrations for each card:
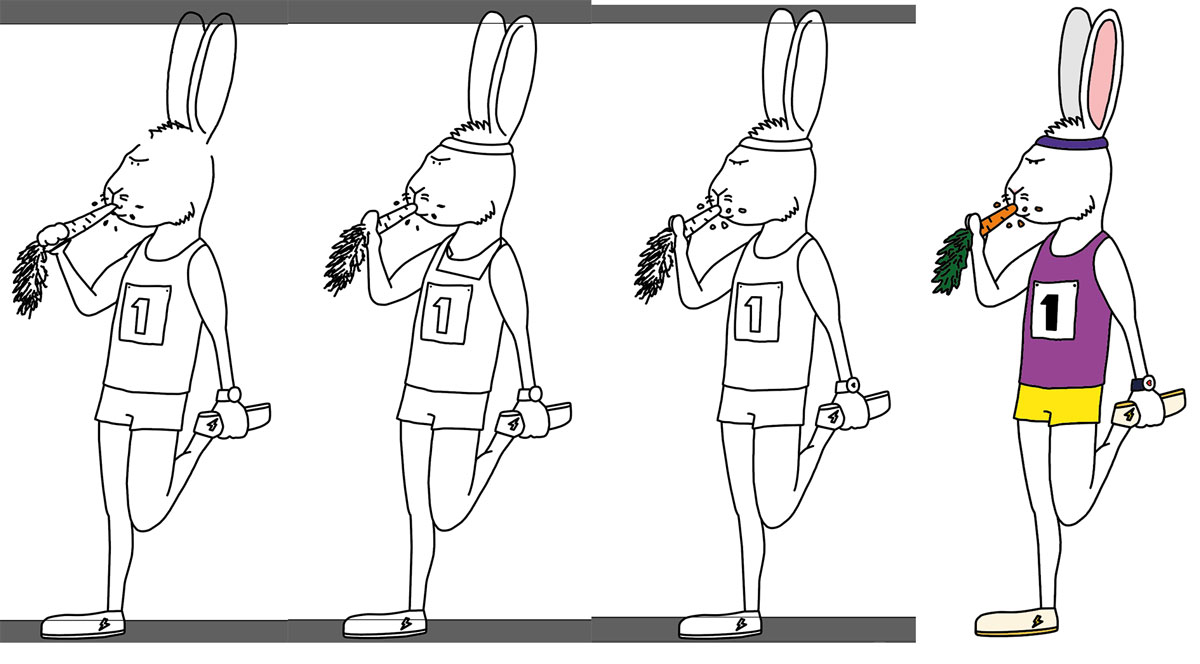
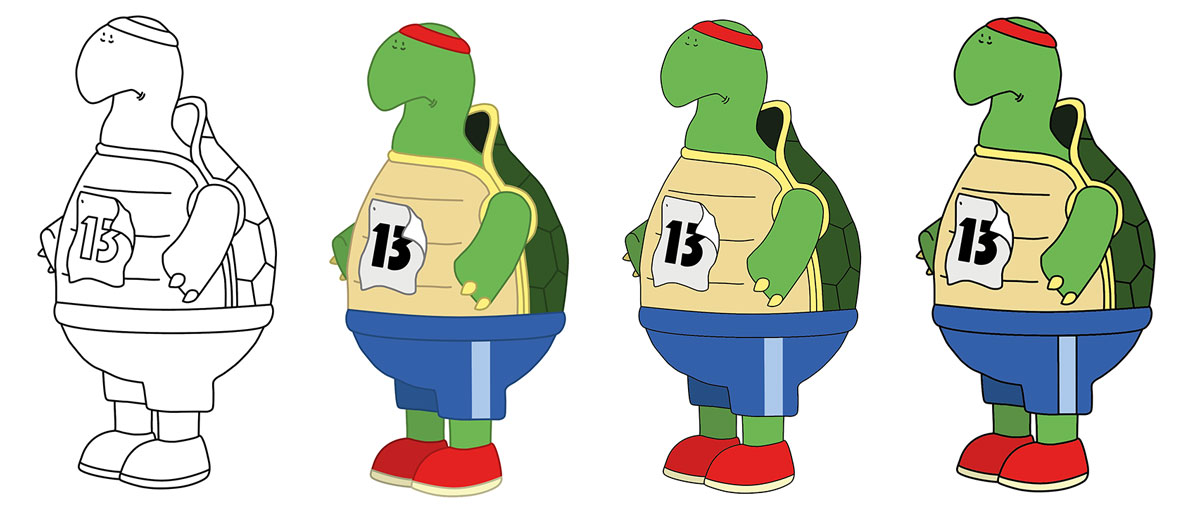
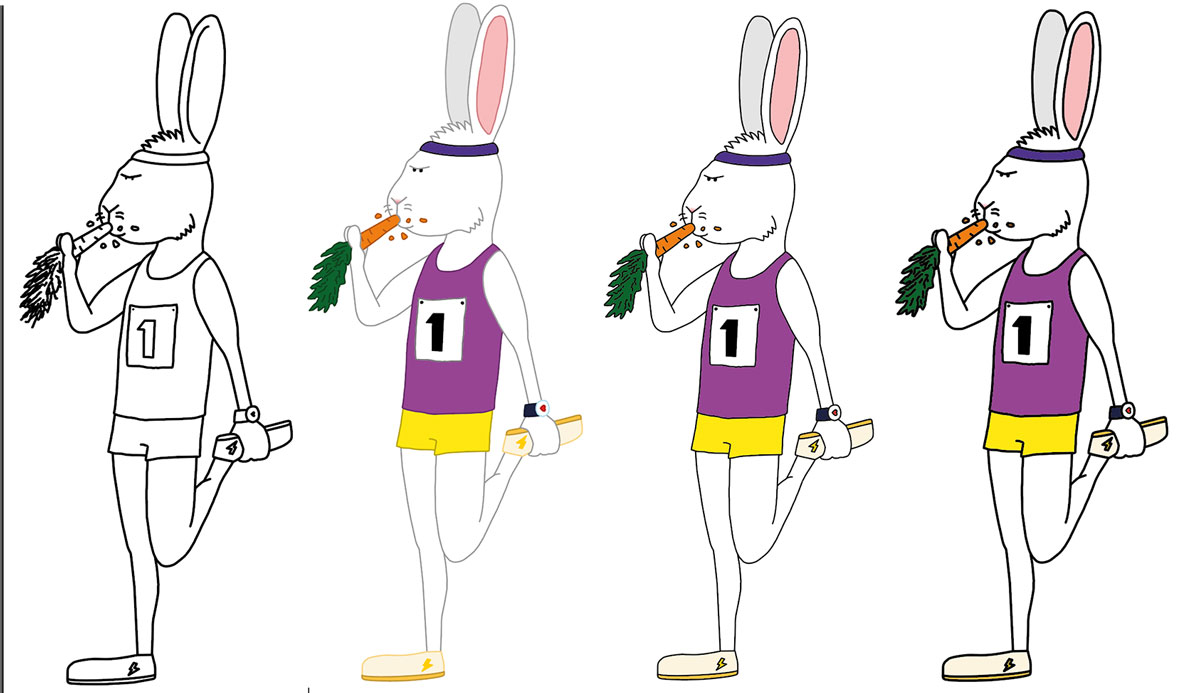
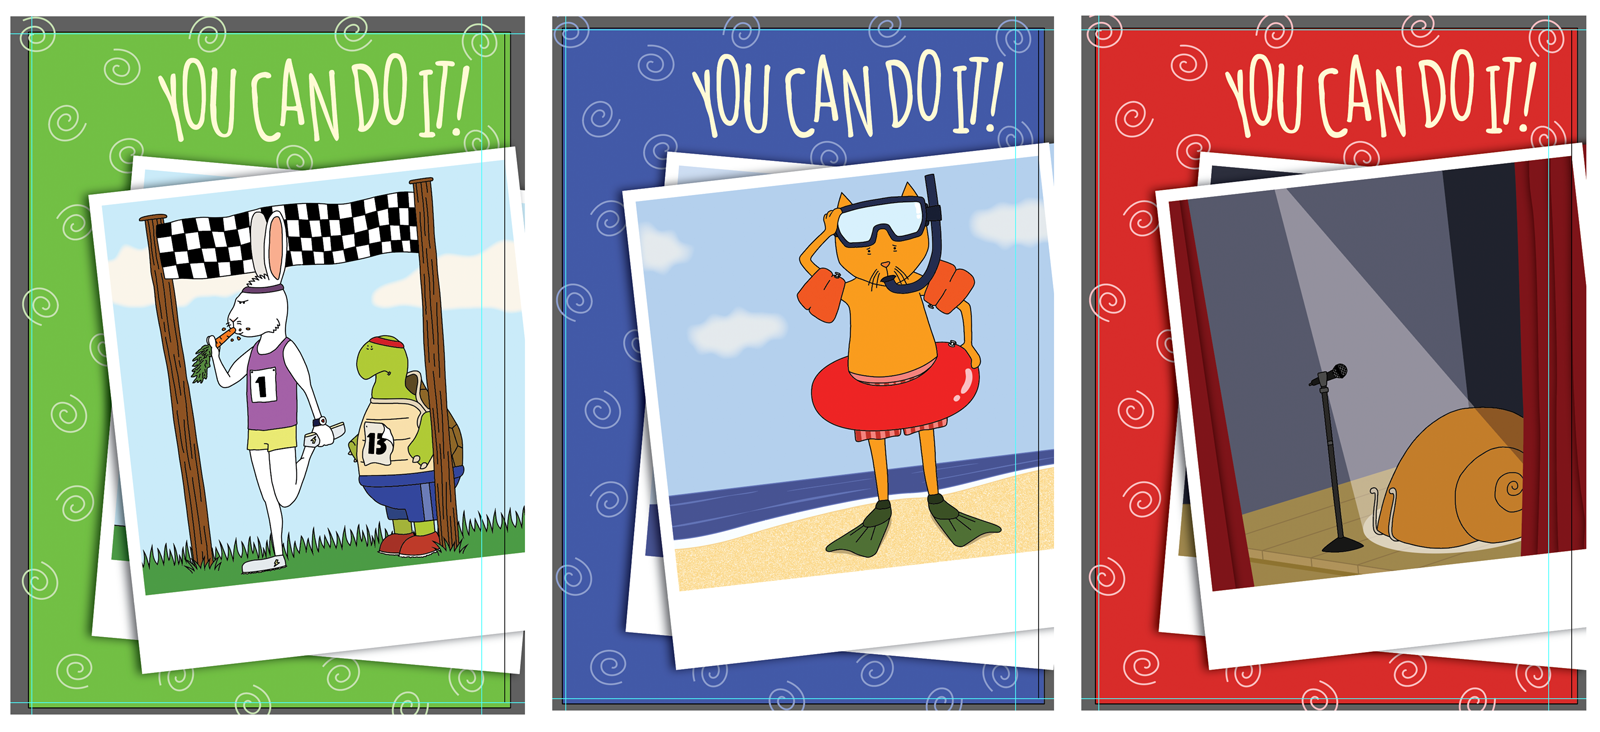
Card 1. Tortoise and Hare: at the start of a race with the tortoise looking very unsure next to a lean and pumped hare.
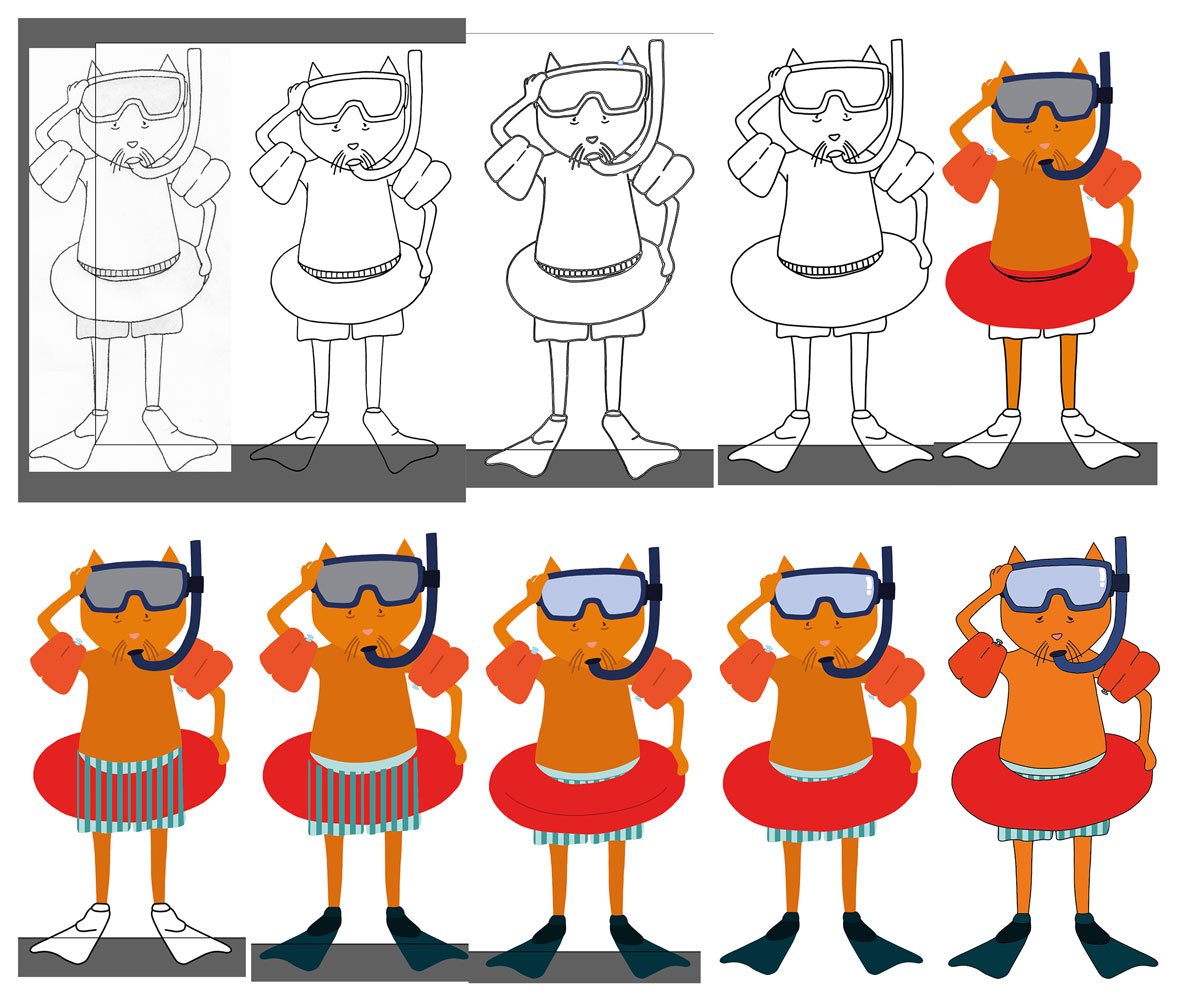
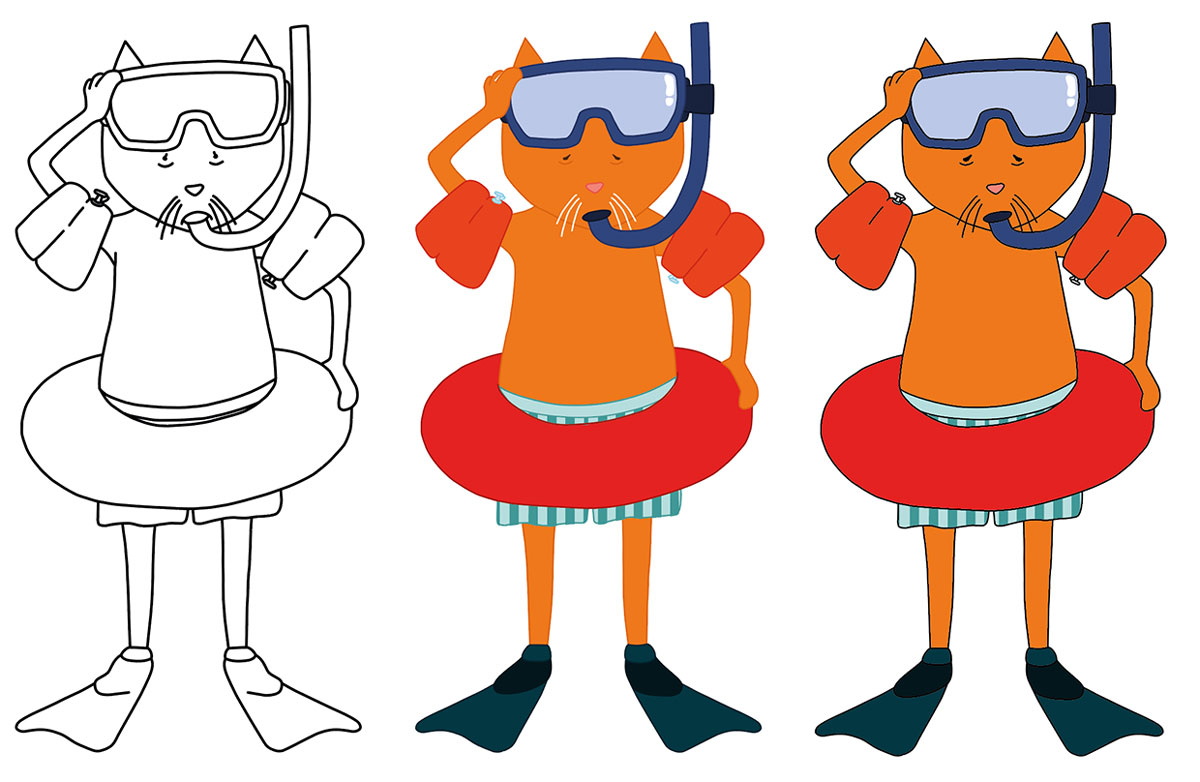
Card 2. Cat preparing to get into some water: snorkelling equipment, arm bands, inflatable ring and flippers; looking very apprehensive.
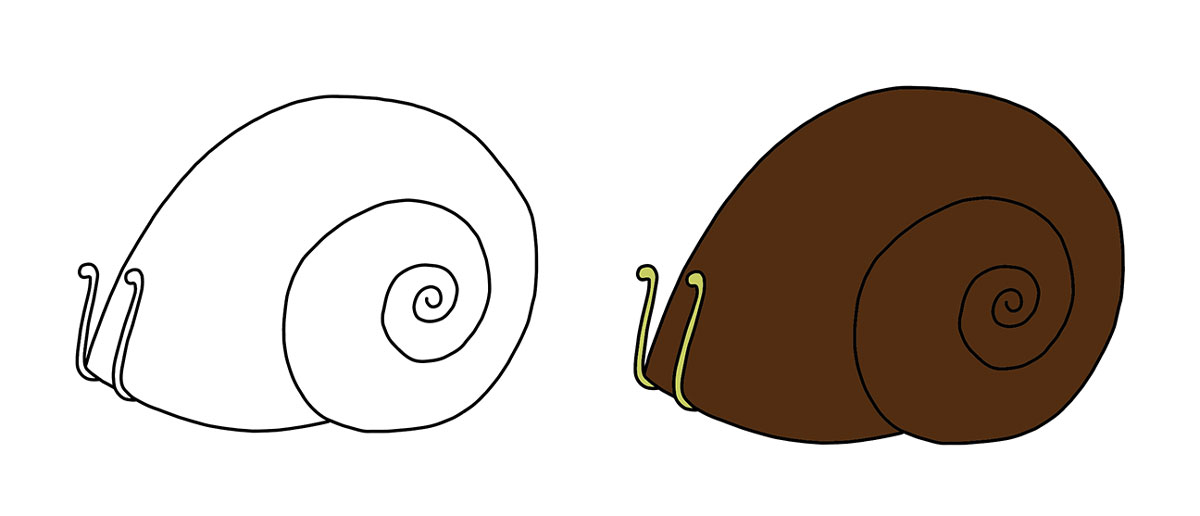
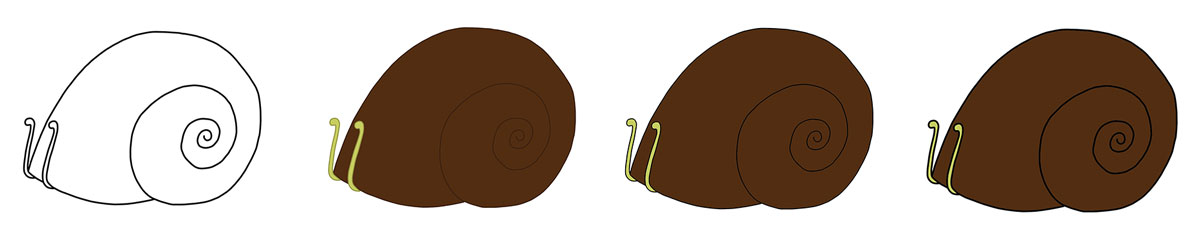
Card 3. Snail: on a stage in the spotlight, hiding in its shell.
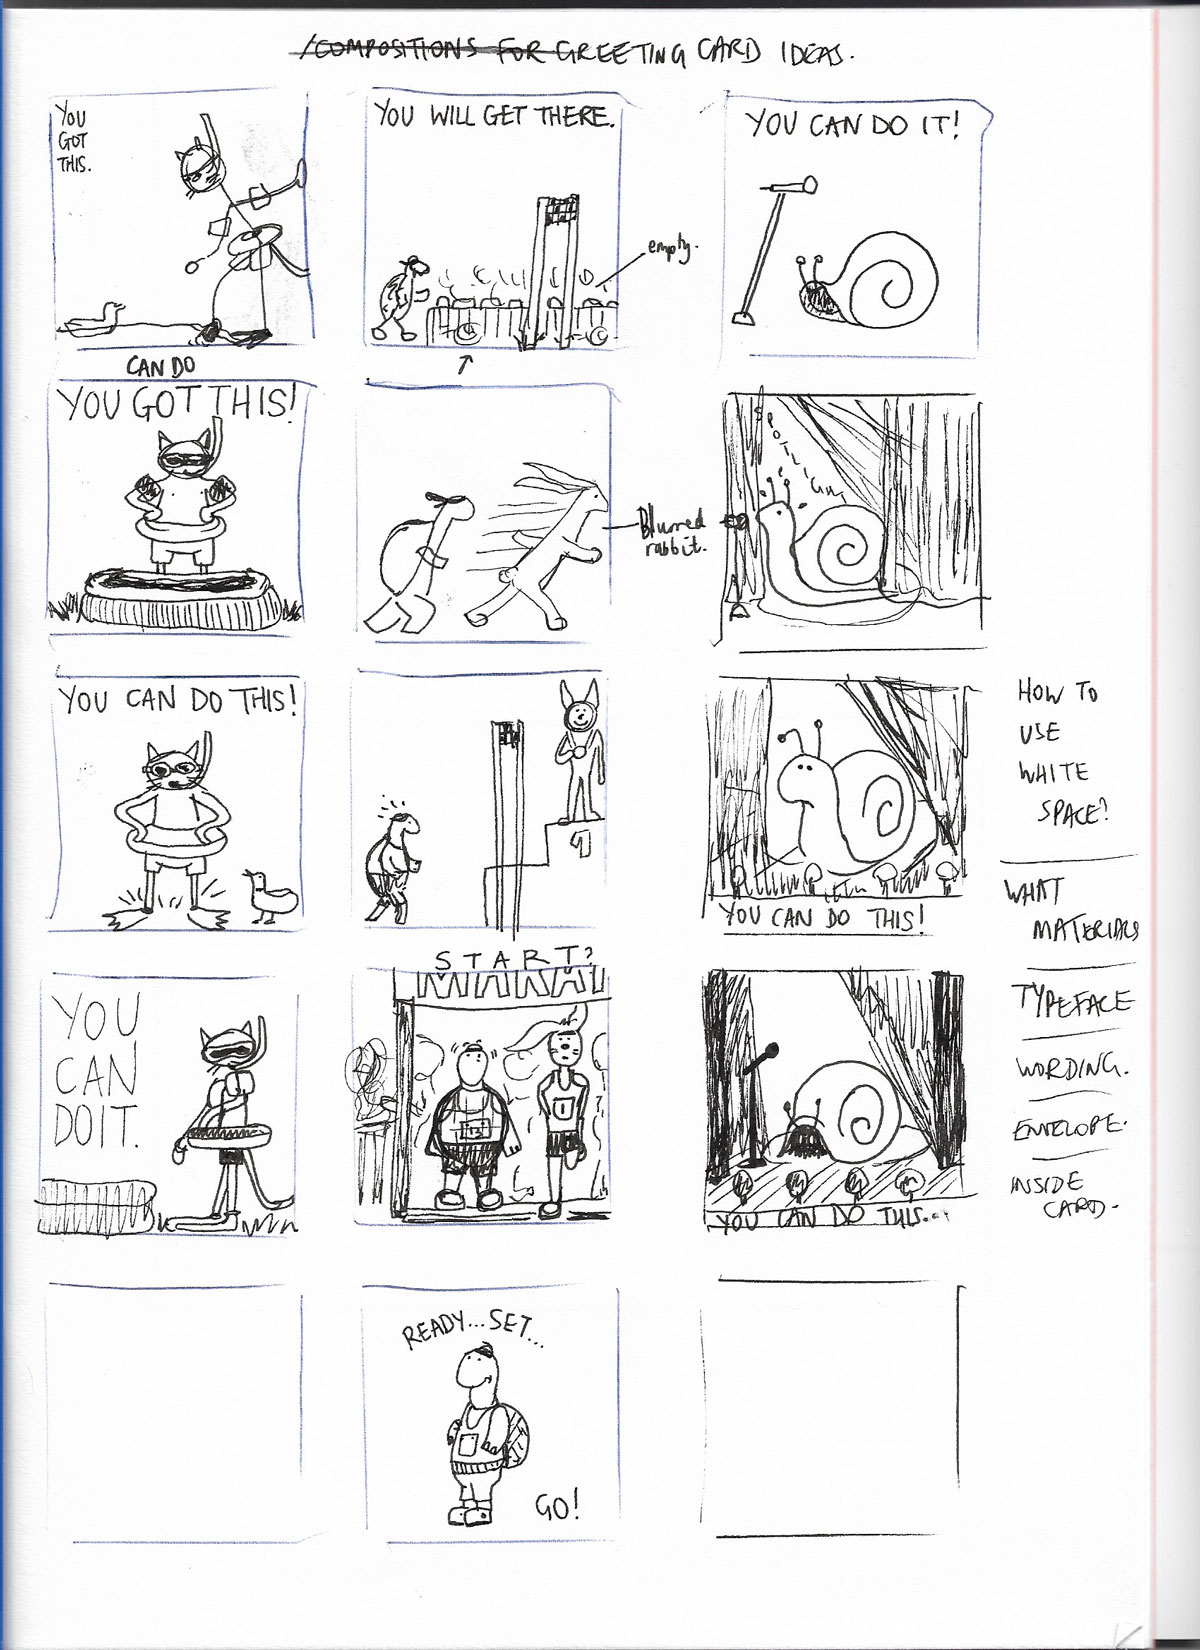
THUMBNAILS
I created a set of thumbnails for each card design. This assisted in visualising composition ideas.
DESIGN PROCESS
CHARACTER DESIGN
I used layout paper to sketch the characters. Next, I inked the outlines of the illustrations.
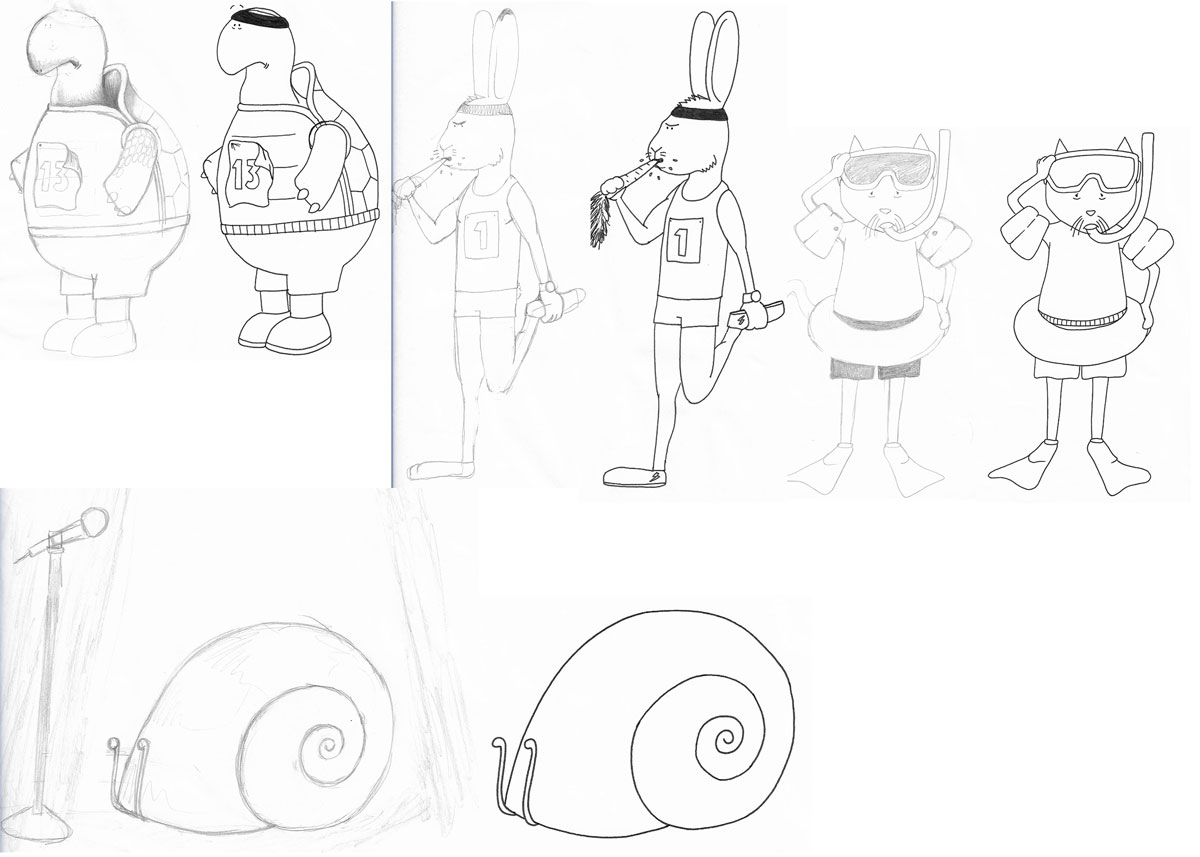
I scanned the outlines into Illustrator. I then used the Image Trace tool, which I was not familiar with, and tidied up the points whilst attempting to keep the hand-drawn feel of the illustrations. In the past I always tried to make things look perfect and symmetrical, which can sometimes make for a less successful result. I was pleased, therefore, to learn this new technique and the outcomes were what I had hoped for.
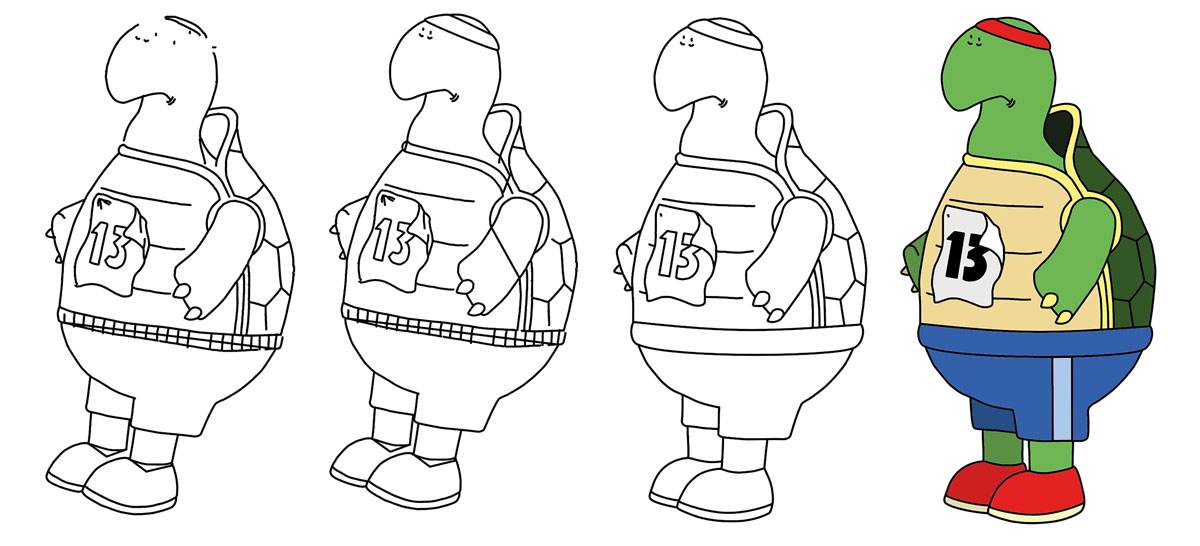
DESIGN DECISIONS
Once I was fairly happy with the progress of the characters, I began working on the background elements. I tried a few options, but they looked very amateurish and I was not at all happy with them. I also did not approve of the typeface I had used (Avenir), as it was not suited to the design I wanted to create. I tried a few different typefaces, but they just did not sit well with what I wanted the feel of the overall design. The only aspect that I was content with was having the character off-centre.
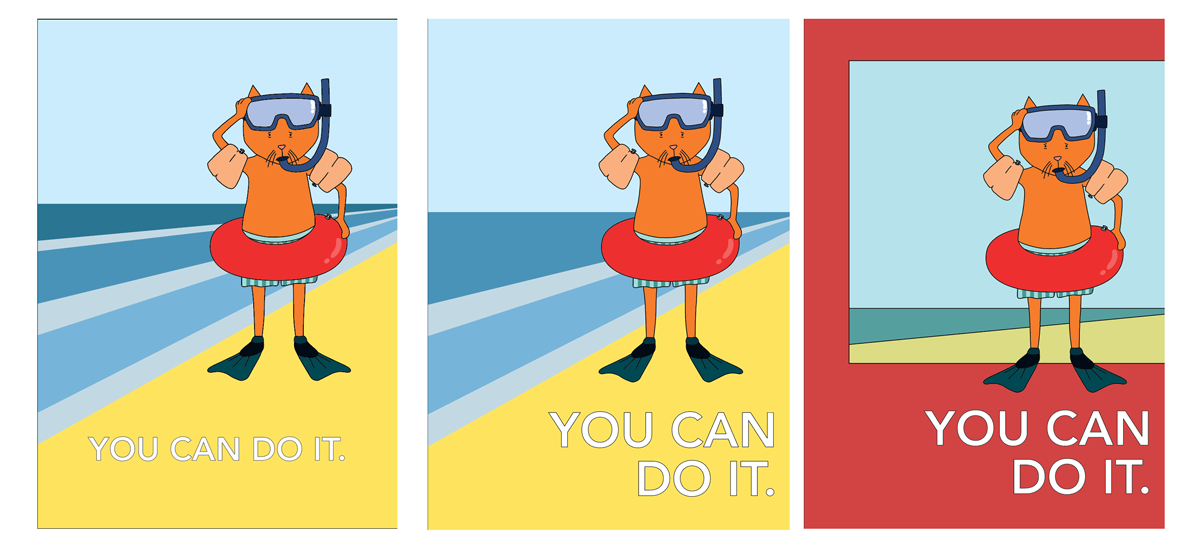
I referred back to the purpose of the cards, to encourage someone to overcome a particular fear, and thought about how this could be reinforced in the design. I then came up with the idea of framing the illustrations within a Polaroid, which could suggest that whatever the fearful event was, it would soon become a memory, like a photograph.
Moving forward from this, I could progress with designing the background scenery for each illustration, using the same process as for the characters. I tried various compositions and printed out several versions for comparison. After watching the Demystifying Posters video by Ellen Lupton on Skillshare, as mentioned in a previous post, I took on board what she said about ‘activating the angle’ and cropping. This definitely improved the layout of the design by making it more dynamic and it also was meant to represent how Polaroids might be placed haphazardly on a surface or pinboard.
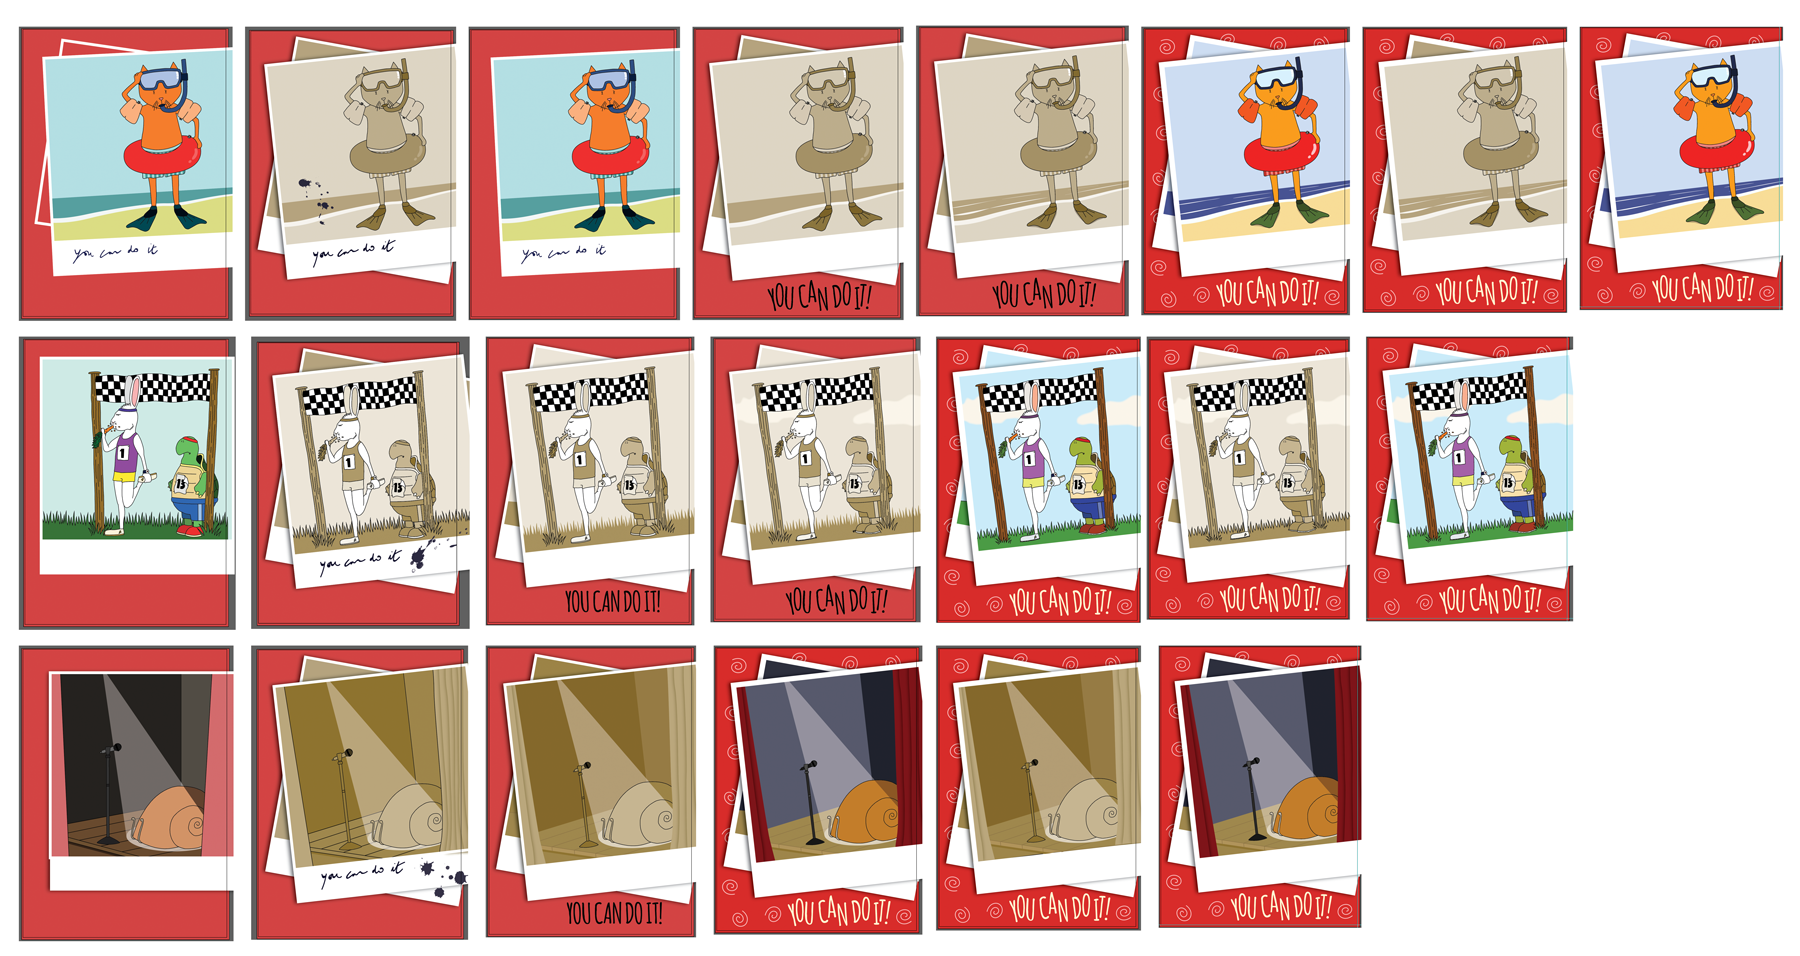
I thought that the use of a handwritten style font would be appropriate for the Polaroid concept, but after scanning in my attempts, I decided this did not look that good. I then discovered the novelty font Amatic on Font Squirrel, which I felt was well-suited – it looks hand-drawn and has a illustrative-feel to it – it looks similar to some of the fonts used on cards I particularly liked. I first tried the text in a straight line, but then made each letter into a compound path, which allowed me to move the individual letters around, creating a more fun, lively line of words. I also decided that having the font in black did not look right, so changed it to a yellowy-white, which was much more suited to the overall design. I was really pleased with the final look of the wording.
I initially chose red for the background it is a colour with connotations of courage. However, I decided that I needed to add something else to liven up the background. After trying a few basic shapes, a series of twirls seemed to be the best fit, as they do not distract from the main design. I think they blend with and help energise the text even more.
I wasn’t sure whether to make the Polaroids appear to be sepia, black and white or full colour, as I thought the first two options might add to the idea of the photos depicting something in the past. I had been using my personal printer as I progressed, but I felt I had reached the point to order a couple of copies from Redbubble. I ordered a black and white copy of the snail card and a colour one. As I had been so focused on creating and criticising the designs, it was quite pleasing to take a step back and see how far the cards had progressed. I was very happy that the colours came out brighter than on my home printer – the Redbubble versions looked more like what I had been seeing on screen.
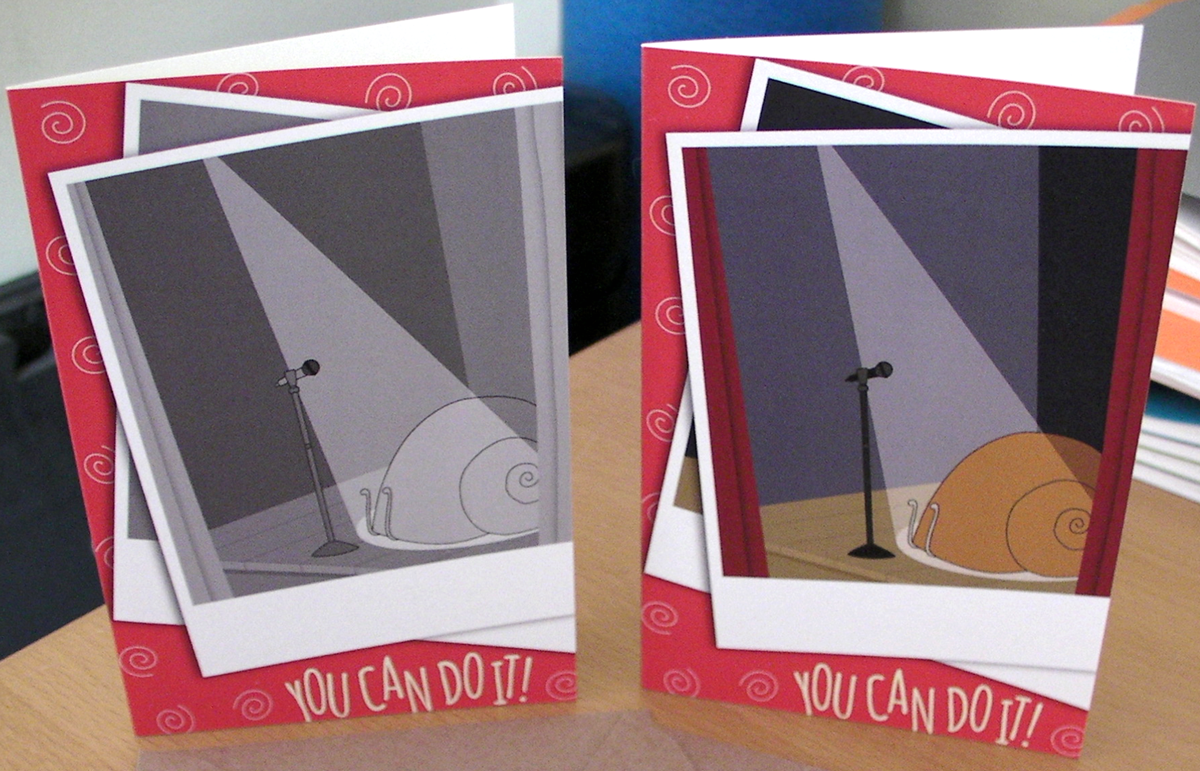
The printed results made me decide that the the full colour version was the way forward as the black and white looked too muted/dull for a greeting card meant to encourage someone. It also became apparent that I needed to adjust the layout to fit better on the card and also the text needed improvement.
FINAL IMPROVEMENTS
I moved the text above the image and enlarged it, which made it more prominent and also conforms to the design of most cards displayed on card shops (where generally only the top half of the card is visible). I also scaled down the size of the Polaroids and slightly amended the rotation so these fit better on the page. Finally, I changed the background colours so that each one related to a colour within the individual illustrations.
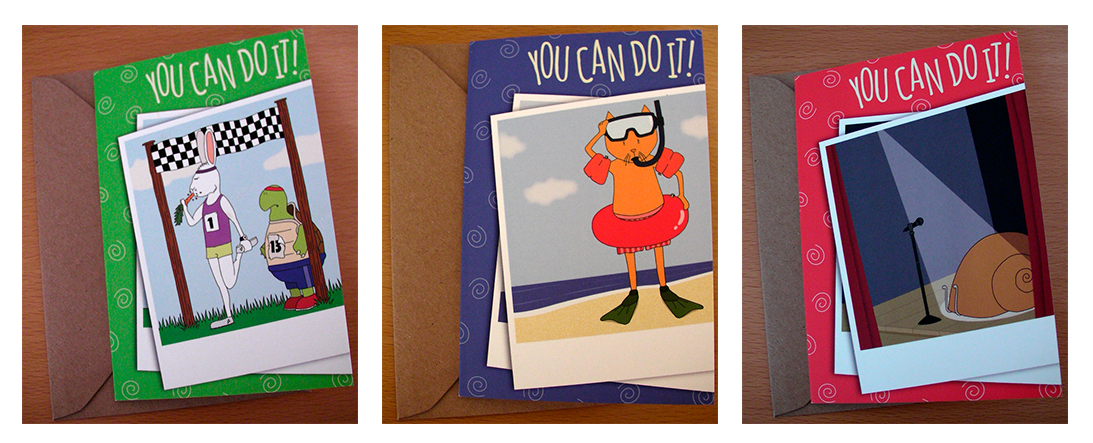
FINAL PRINTS
The final printed cards are shown below. I felt these designs were a definite improvement on the previous versions. Overall I was fairly happy with the results for my first attempt at making greeting card designs. I was also really pleased with the quality of the cards from Redbubble.
EVALUATION
I found this assignment challenging, particularly the fact that I could not clarify anything in the brief with a real client. Apart from general feedback from various people, I had no real idea whether or not I was on the right track. I ended up creating designs that I would happy with selling for myself rather than for a particular client as the brief was so open and therefore I had to make most of the decisions. I also found it hard to work through the full design process as outlined in the course handbook as it was my first time doing it.
It took me a very long time to come up with ideas for this assignment, I did not find mind mapping particularly useful for this project. However, once I had started looking at examples of card design online and found artists whose work I admired, I began to feel more confident in what I could produce and it inspired me to make some initial sketches. I really enjoyed drawing the characters and then working on them in Illustrator. I was pleased with the finished hand-drawn look of them and they turned out as I wanted them to. I think the final three designs definitely appear to be part of a range of cards.
If I could work on the assignment again and had more time/resources available, I would have explored other options, such as adding hand-made elements.
RESOURCES
Redbubble: http://www.redbubble.com
SixPrint (printers): http://sixprint.co.uk/cards.html
The Greeting Cards Company: https://www.greetingscards.co.uk
The Greeting Card Association: https://www.greetingcard.org
BBC (Oldest Valentine’s Day Card): http://www.bbc.co.uk/ahistoryoftheworld/objects/L1NM_6mWRymAMKXcRDlXJA
UN (International Days): http://www.un.org/en/sections/observances/international-days/index.html
Days of the Year: https://www.daysoftheyear.com
Daily Mail (Article): http://www.dailymail.co.uk/news/article-5688967/Clintons-sell-Star-Wars-Day-Ed-Balls-Day-cards-bid-win-trade.html
The Curious Pancake: https://www.thecuriouspancake.co.uk
Gemma Correll: https://www.gemmacorrell.com
The Quirky Paper Co.: http://www.quirkypaperco.com
Simone Lea: http://www.simonelia.com/index.html
Kristian Jones: http://kristian-jones.co.uk
Tom Gauld: https://www.tomgauld.com/portfolio/
Pranita Kocharekar: http://pranitakocharekar.com
Majasbok: http://www.majasbok.com
Font Squirrel (Amatic Font): https://www.fontsquirrel.com/fonts/amatic
Skillshare (Ellen Lupton Video: Demystifying Posters): https://www.skillshare.com/classes/Demystifying-Graphic-Design-How-Posters-Work/1938197477/classroom/discussions?via=user-profile&enrolledRedirect=1